The slab foundation (Swedish stove) - the pros and cons of this technology. DIY instructions (105 photos)
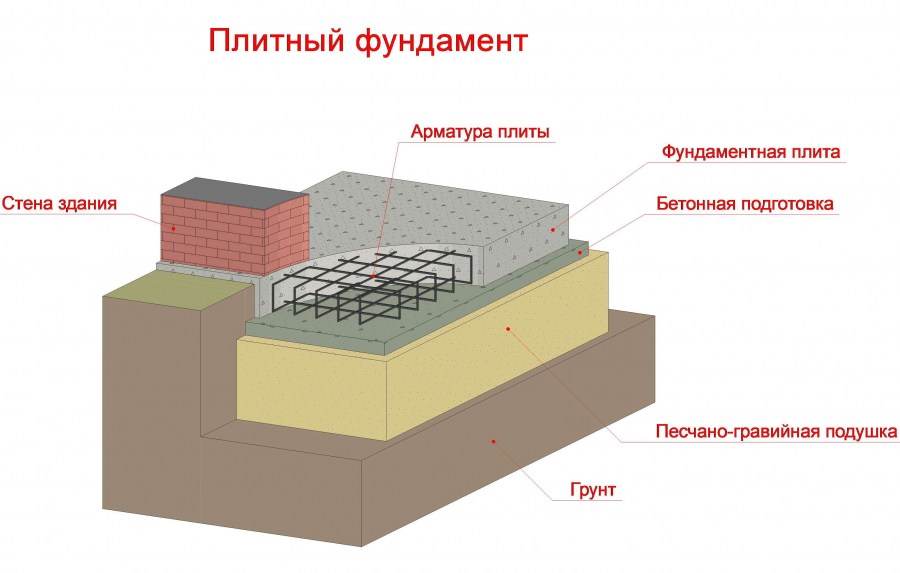
In modern construction, a slab foundation is used, which is the basis for the assembly of the building. If the structure is solid, solid and made under the entire structure, then it is not afraid of soil movements, since the house and foundation move simultaneously. That is why such a base is called a monolithic floating foundation.
The advantages of slab foundations
The main distinguishing feature of the monolithic foundation is universality, since its construction is possible in areas with any soil. In this, the pile-slab foundation differs from the tape and pile varieties of the fundamental foundation.
The design, consisting of slabs, can be installed in areas with peat, sand, and marshy soils. A base made of slabs can be used for a long time even where ground water is located close to the surface and seasonal swelling is observed, that is, the volume of the structure changes in harsh conditions with decreasing temperature.
In addition to the above properties, slab foundations differ:
- high bearing capacity, therefore, it is possible to build one-story and multi-storey buildings, which are assembled from bricks, concrete and gas-silicate materials;
- the possibility of arranging a full basement floor;
- slab foundation technology is simple to build, so it can be done by anyone, even without any special skills;
- the possibility of exploitation for 150-200 years;
- almost complete lack of earthwork.

DIY slab foundation construction
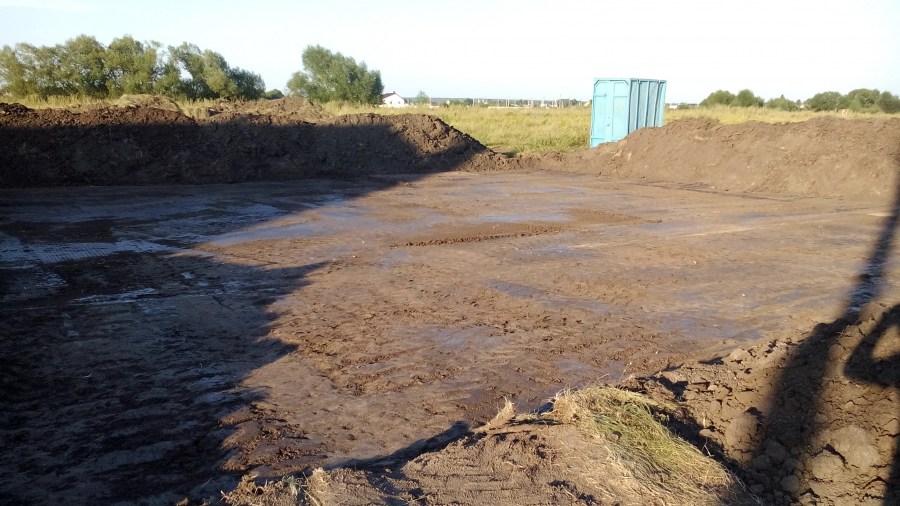
Many people who dream of building a house are interested in the question of how to make a slab foundation with your own hands? First you need to dig a pit and level it. Such work does not imply special skills. But it is worth treating the procedure with special attention, since the fate of the structure in the future depends on this.
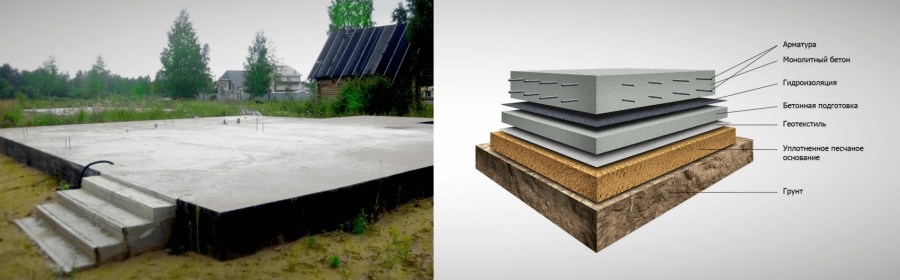
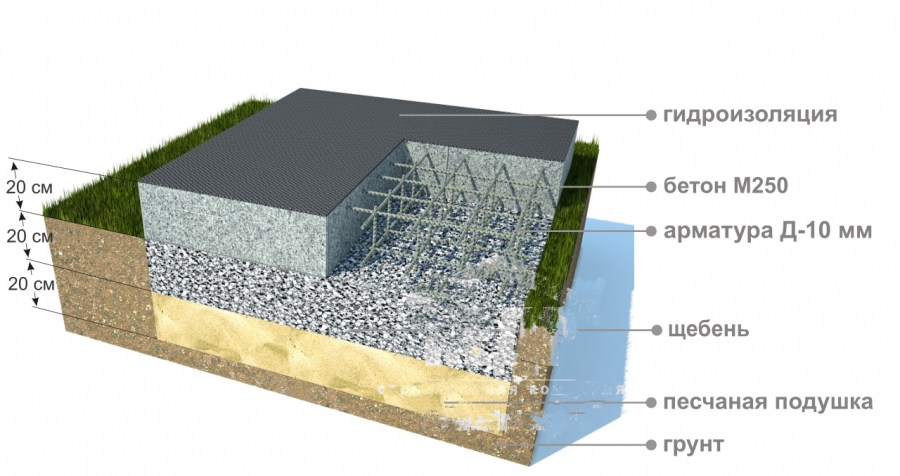
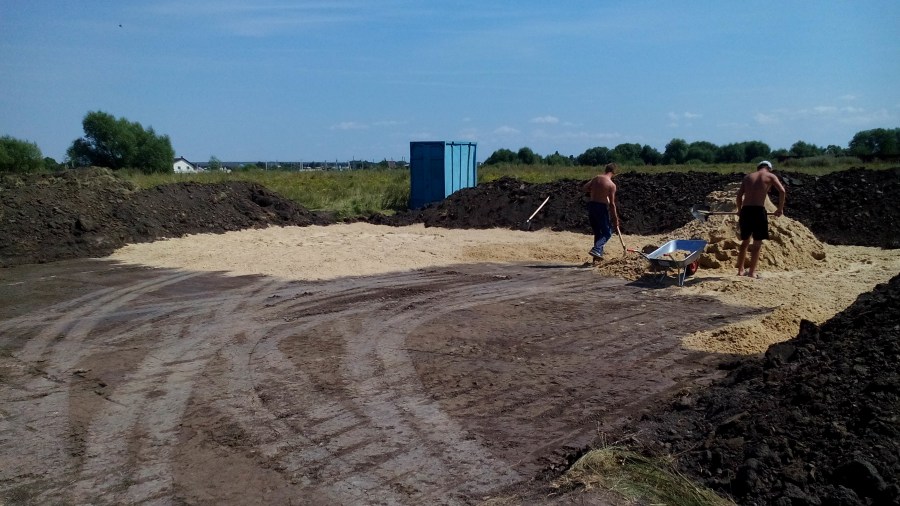
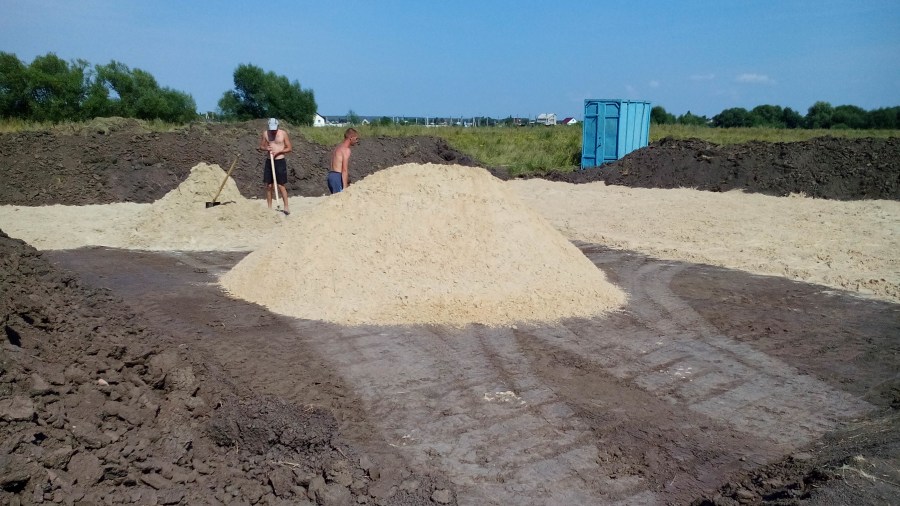
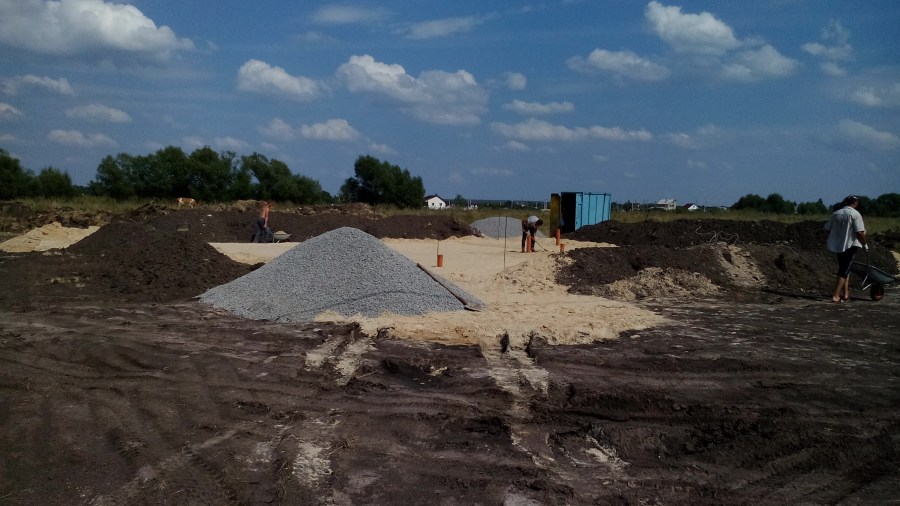
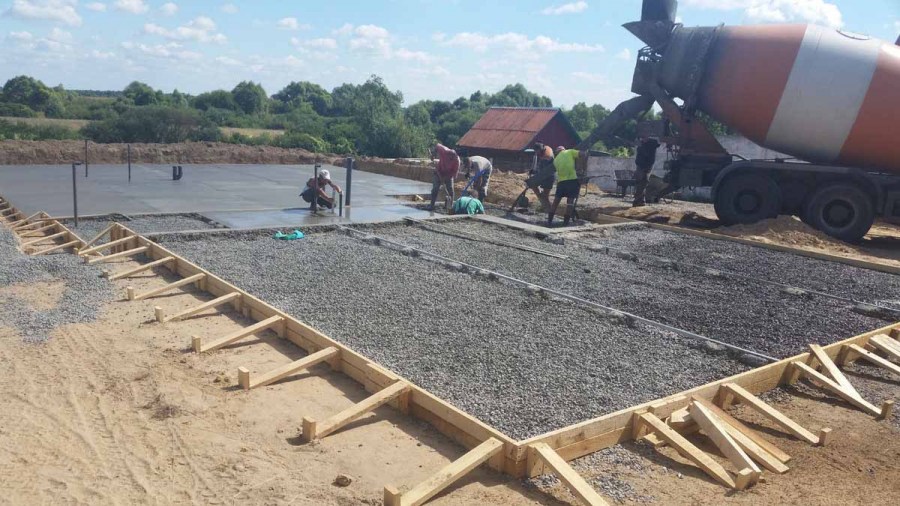
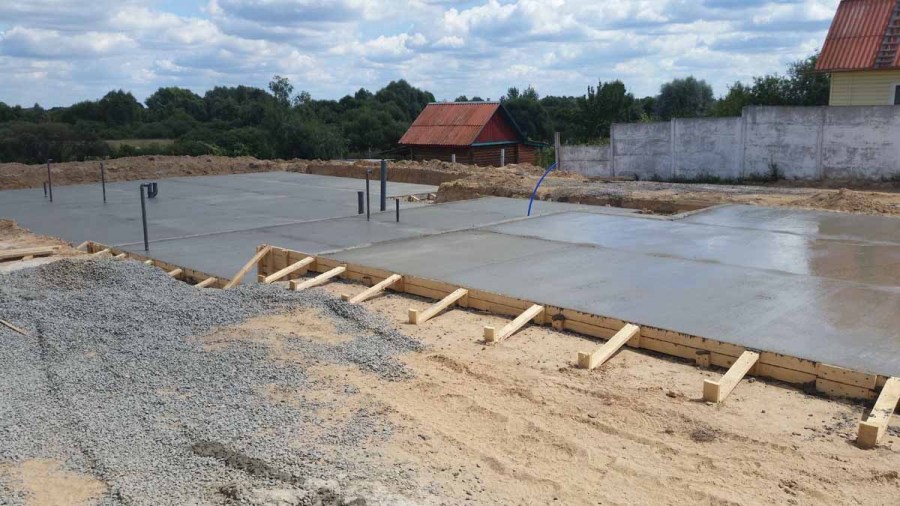
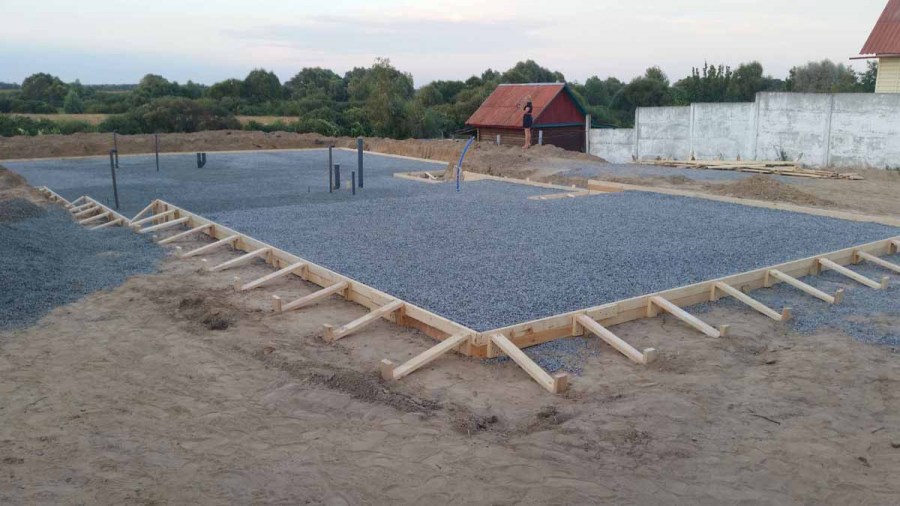
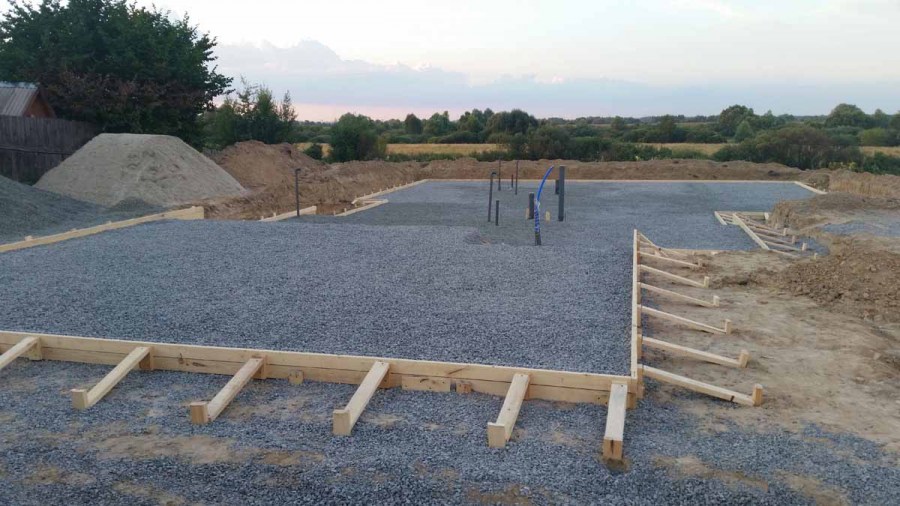
At the next stage, it is necessary to install a kind of cushion, consisting of sand and gravel, under the slab foundation:
- Sand is poured at the bottom of the excavated pit. Choose one where there is no clay, chalk, lime and any other impurities, due to which, after some time, the structure shrinks. Pre sand washed. With the help of such a pillow, the building evenly affects the surface of the soil.
- The sand is compacted in layers, that is, a small amount is trampled, and then the next layer is poured. This will help ensure the integrity of the structure.
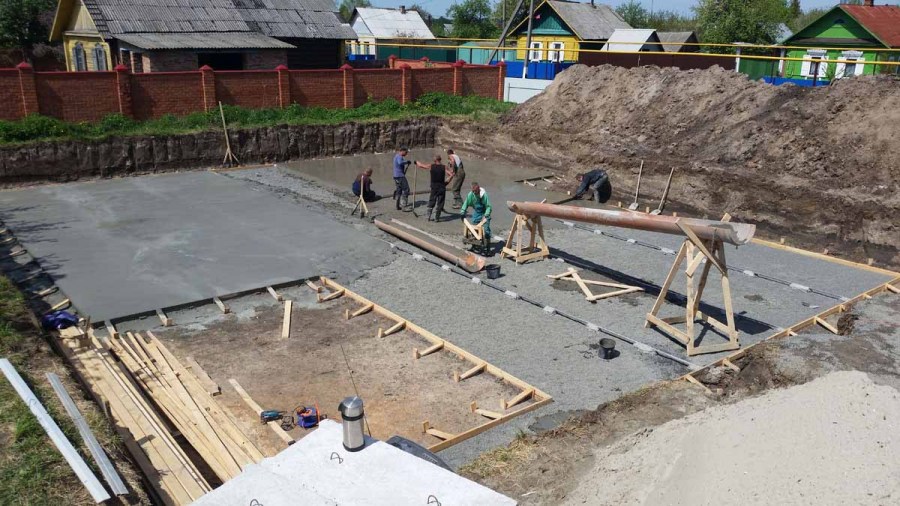
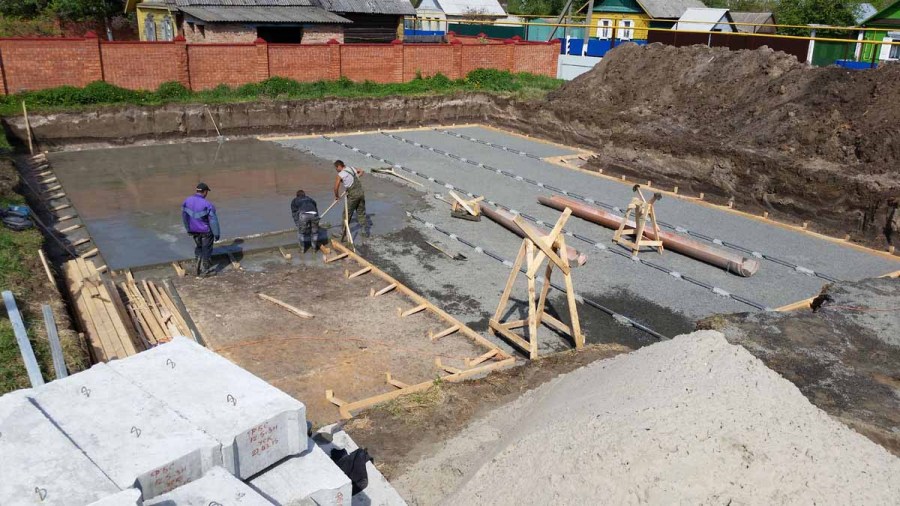
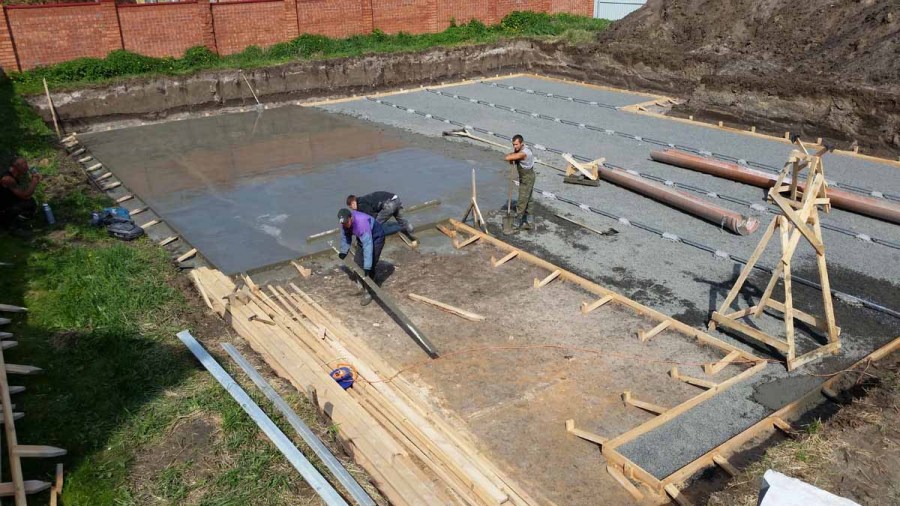
- Builders carry out communications necessary to provide better living conditions in the future.
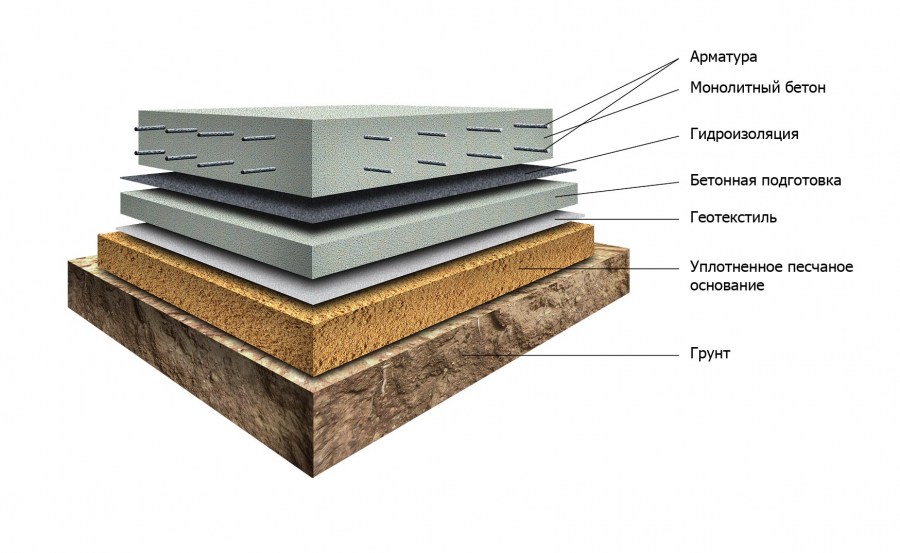
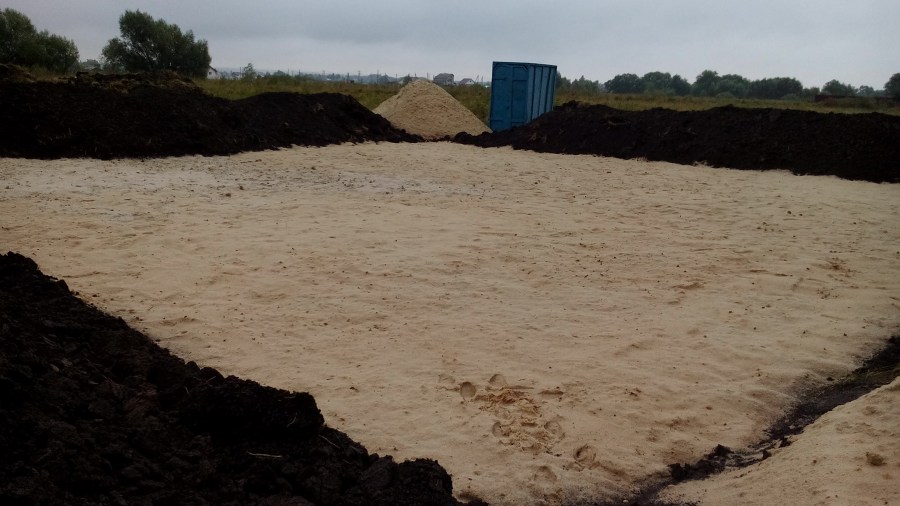
- Geotextile material is spread on top of the sand, due to which the previous layer and crushed stone will not be mixed. If you ignore this, then a subsidence at home is possible.
- Uniform distribution of gravel. Verification of horizontality occurs using a level or a conventional hydraulic level. The rubble is then compacted to prevent the risk of damage to the building in the future caused by movement and shrinkage of the level.

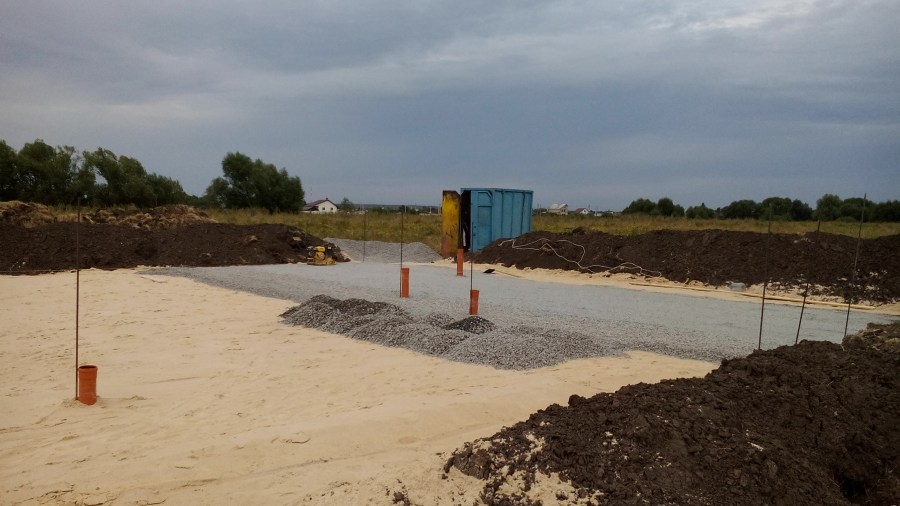
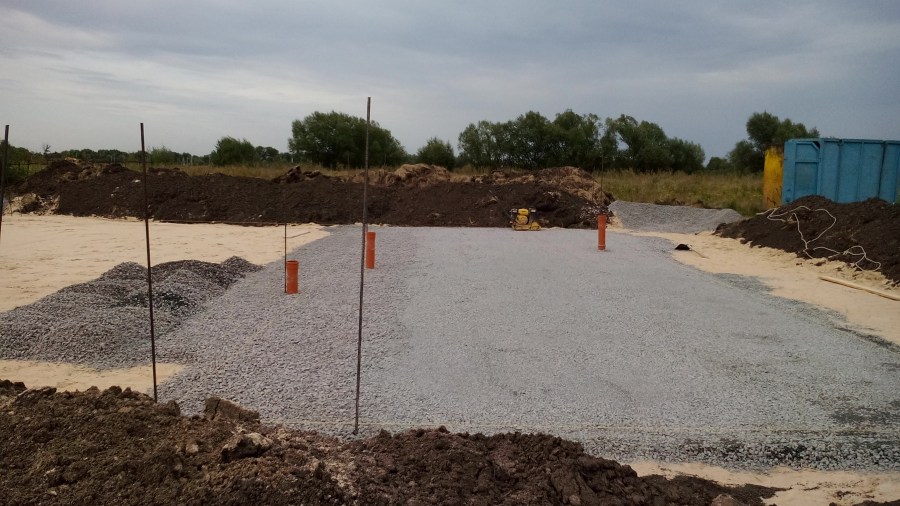
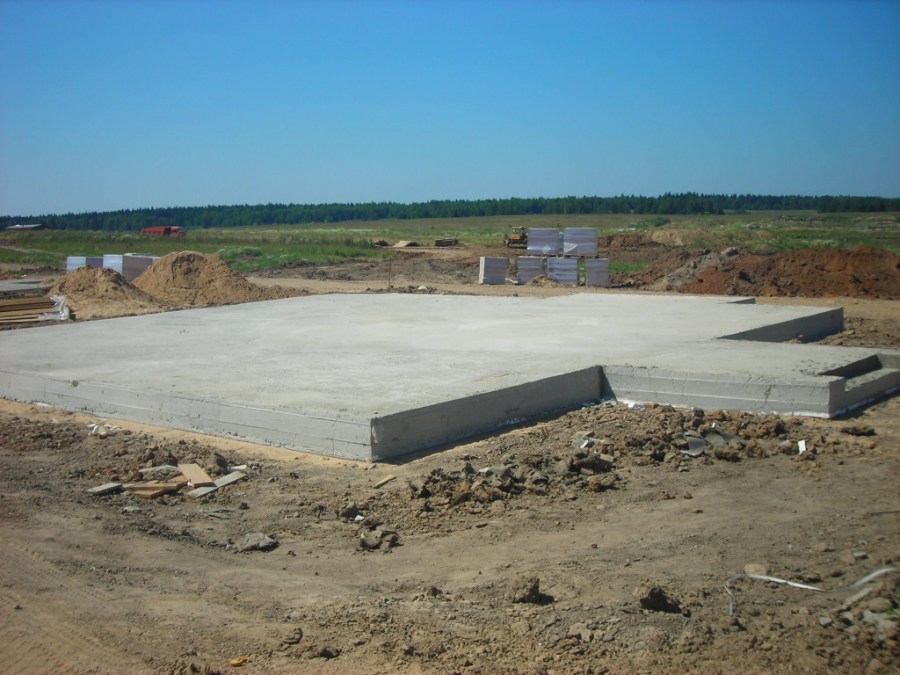
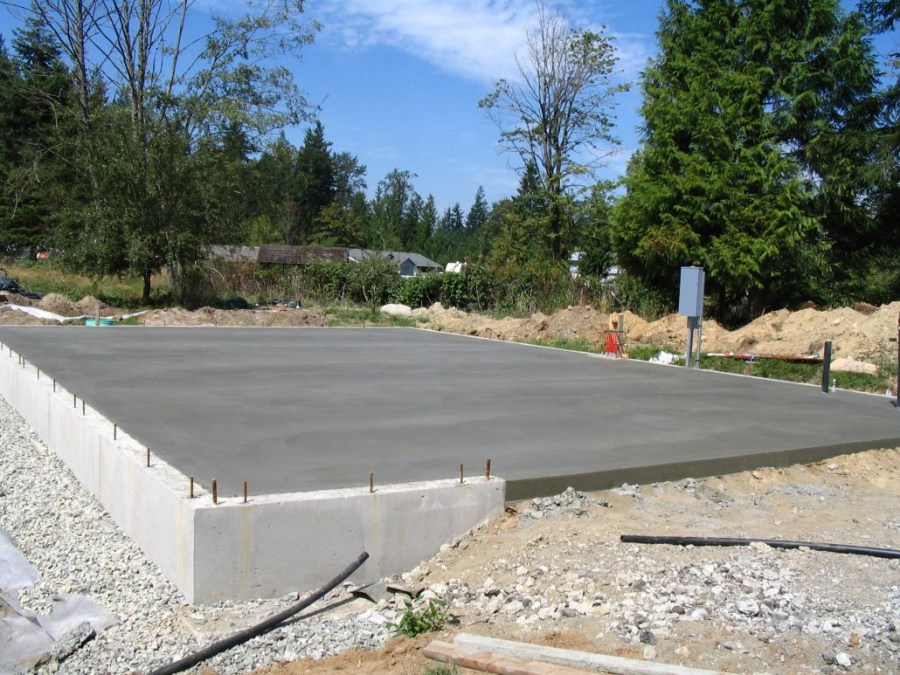
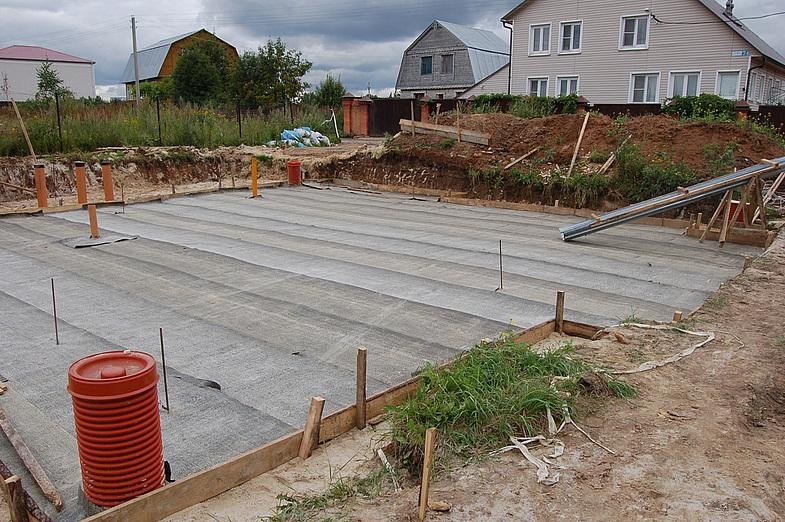
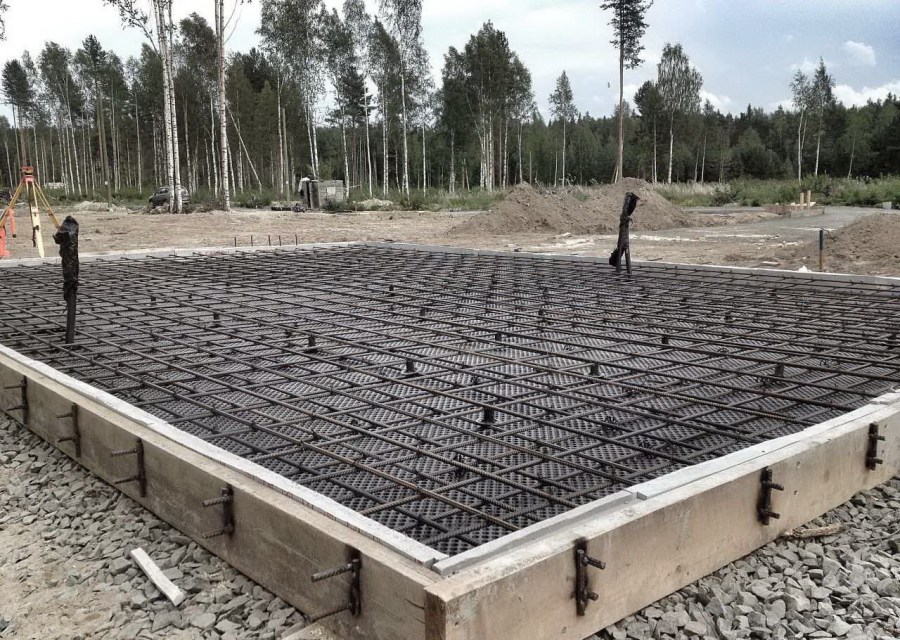
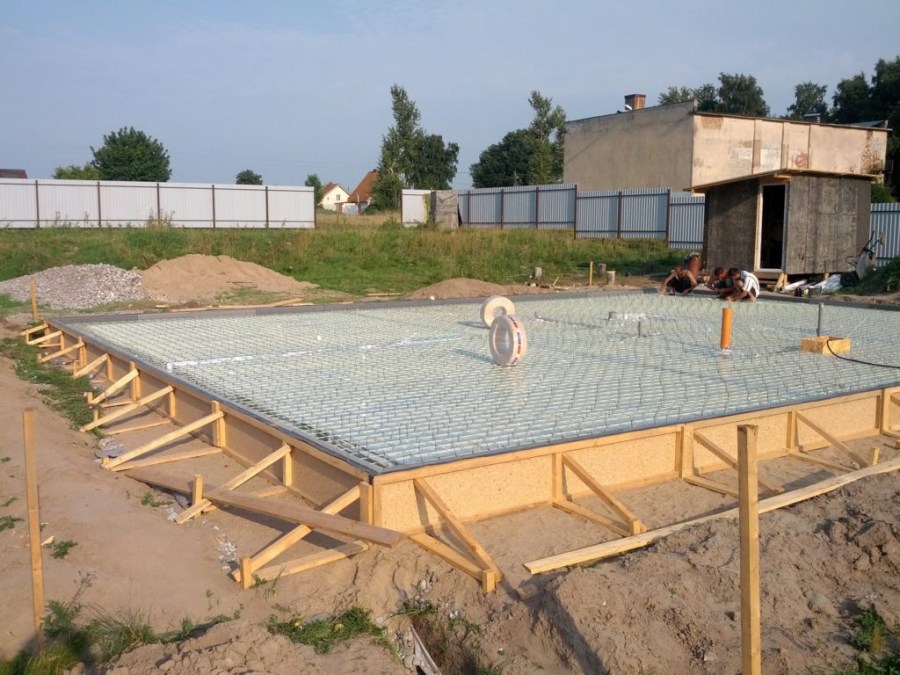
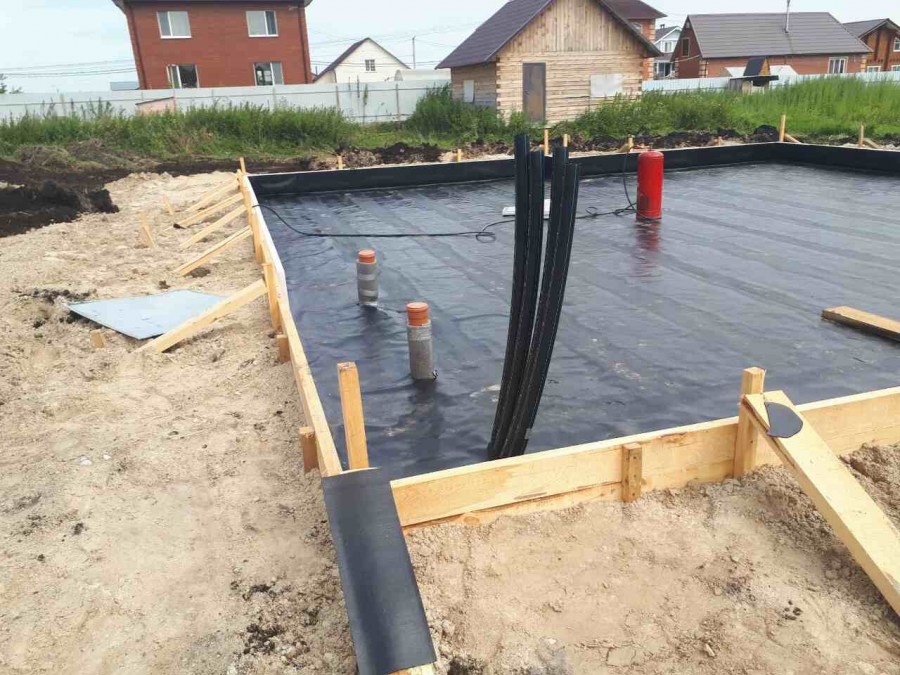
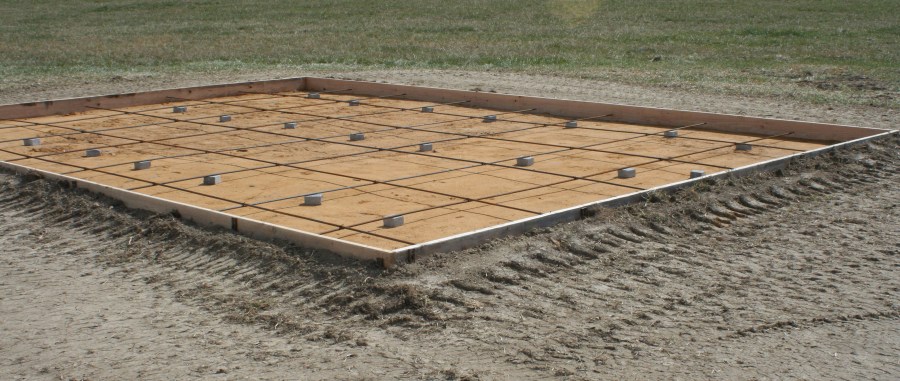
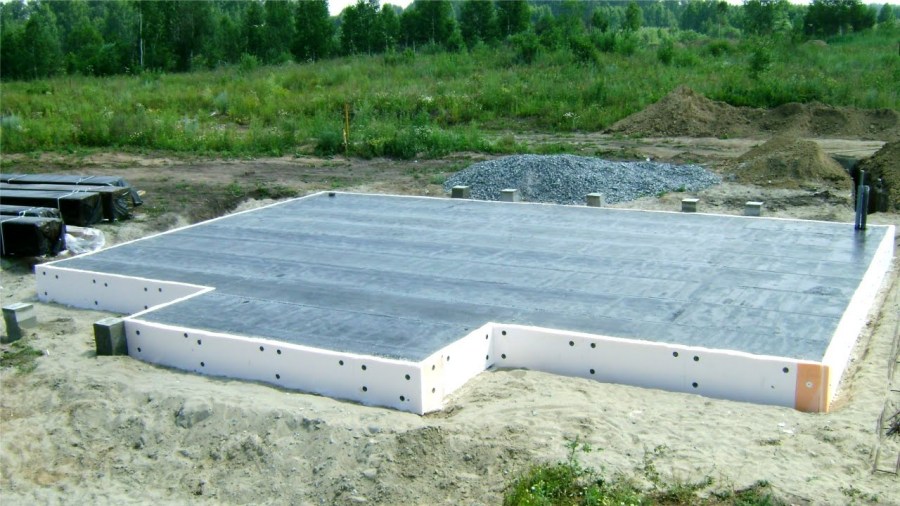
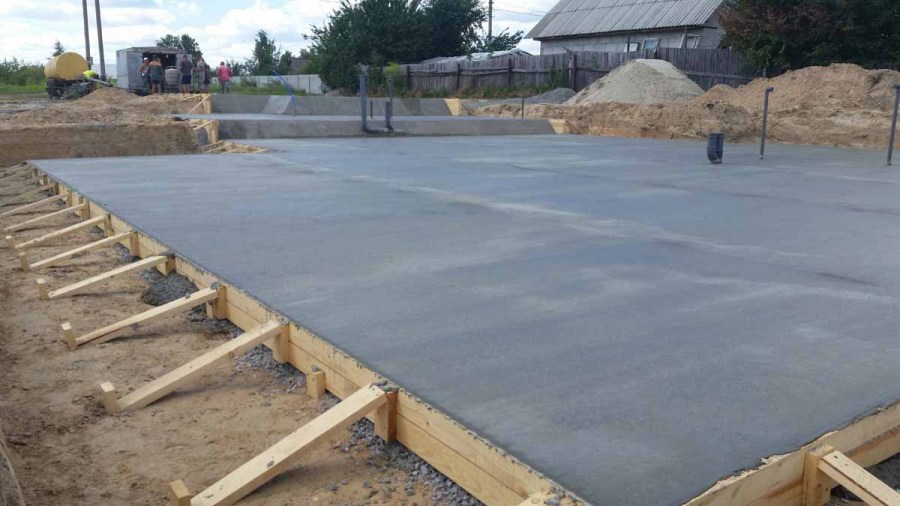
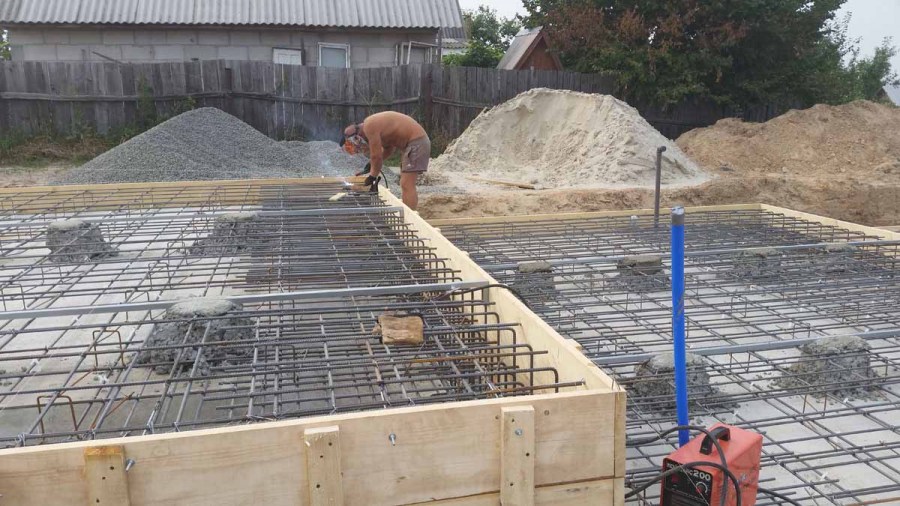
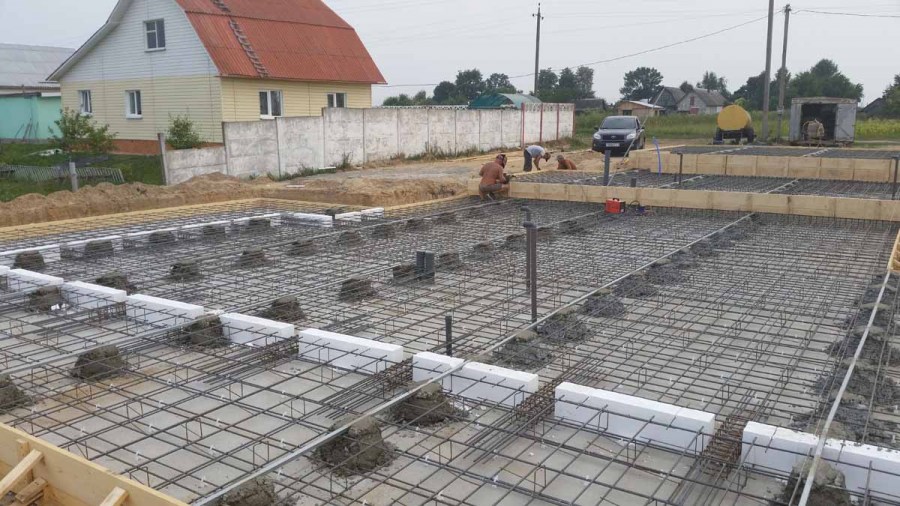
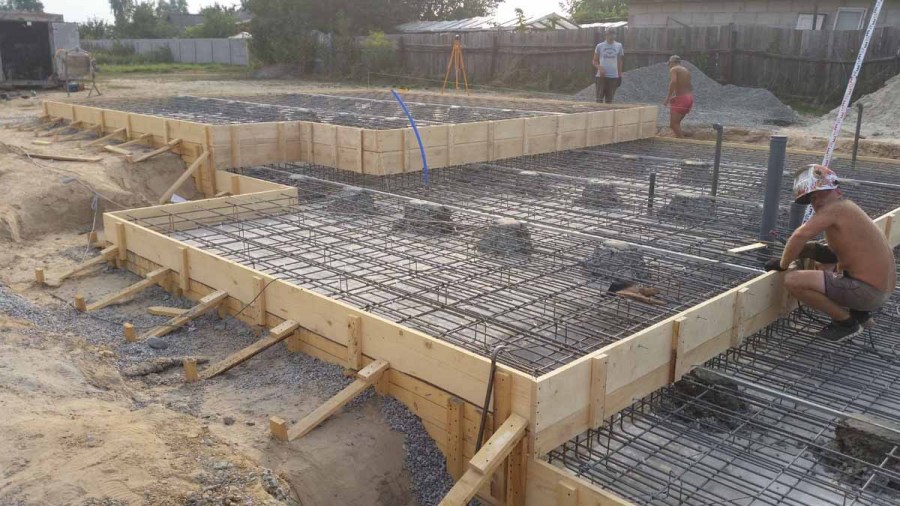
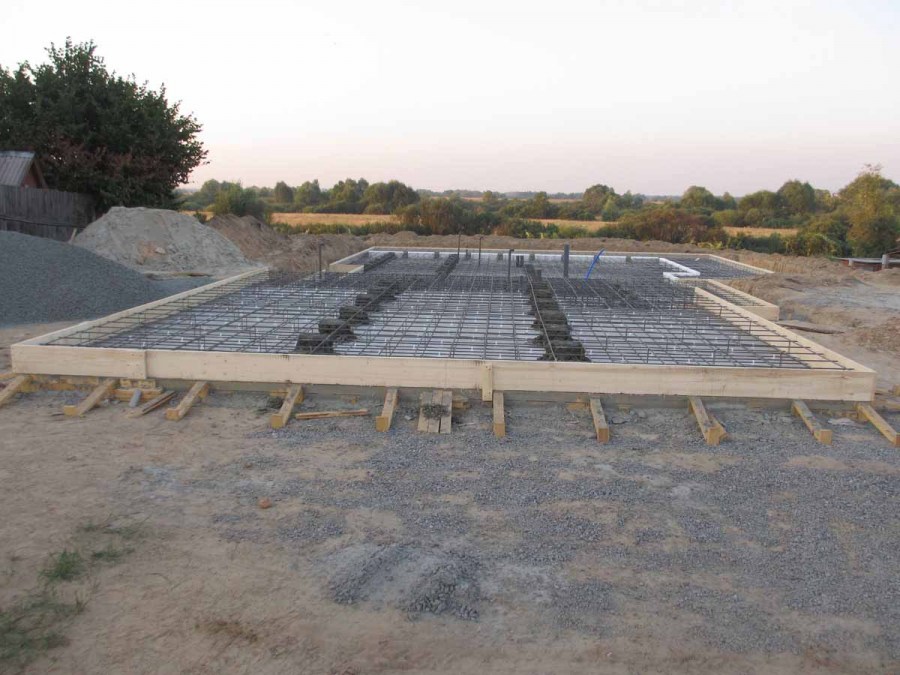
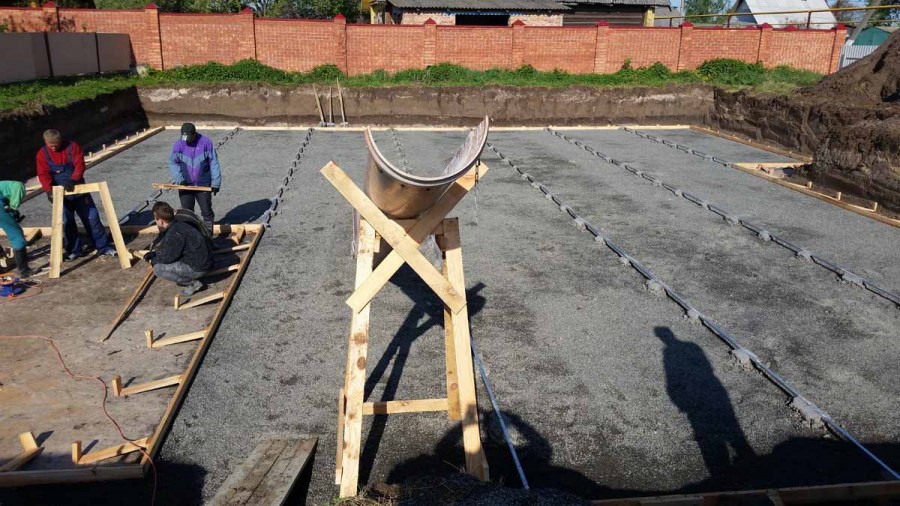
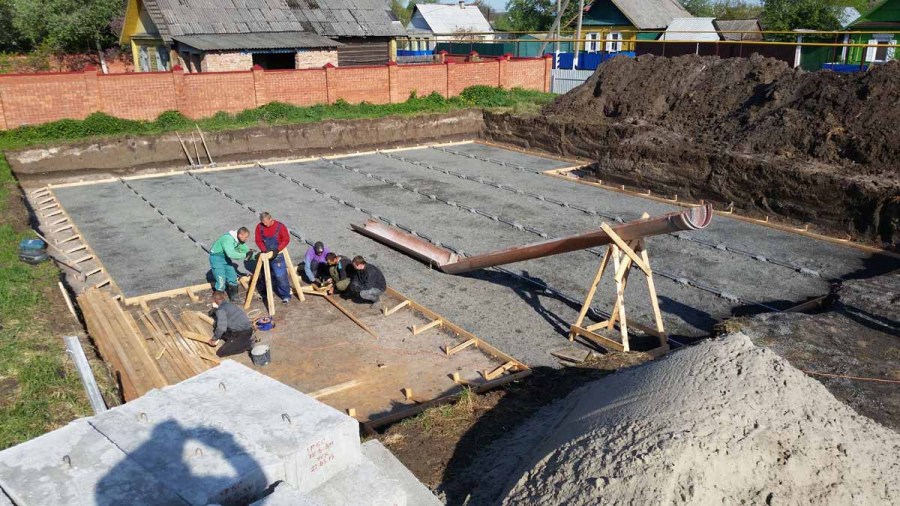
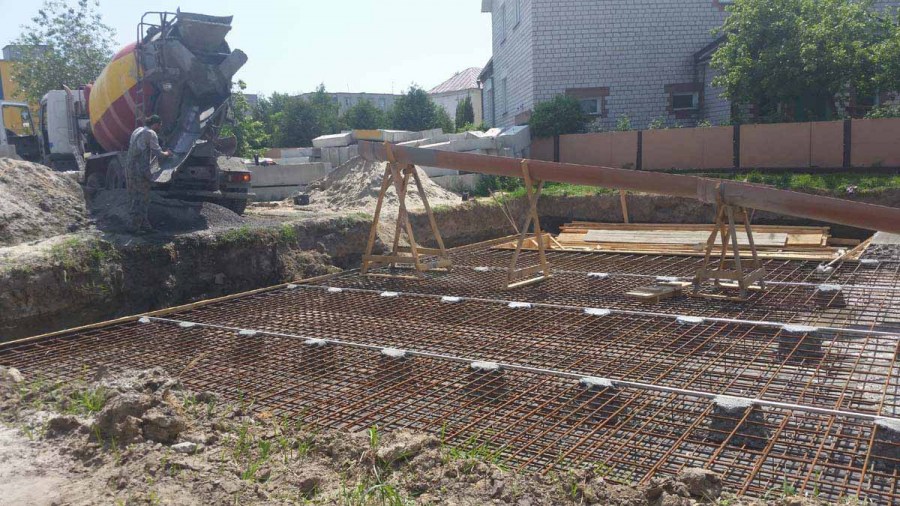
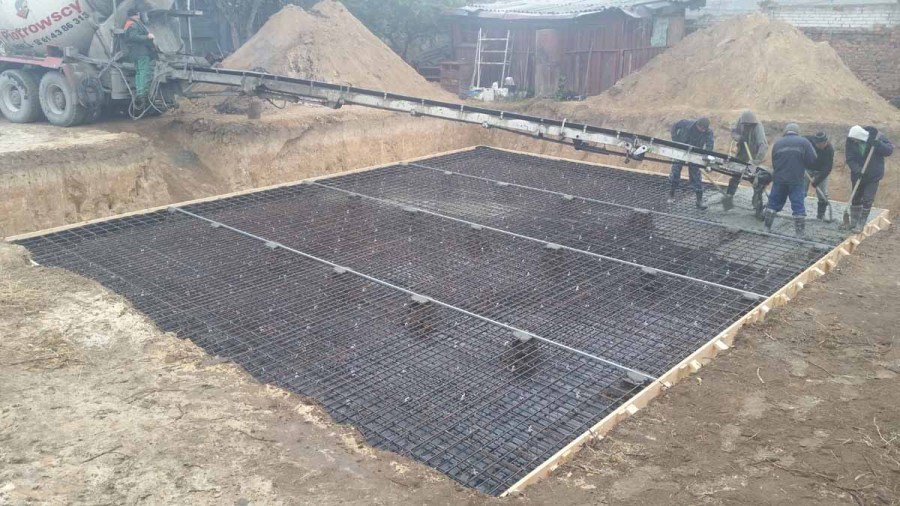
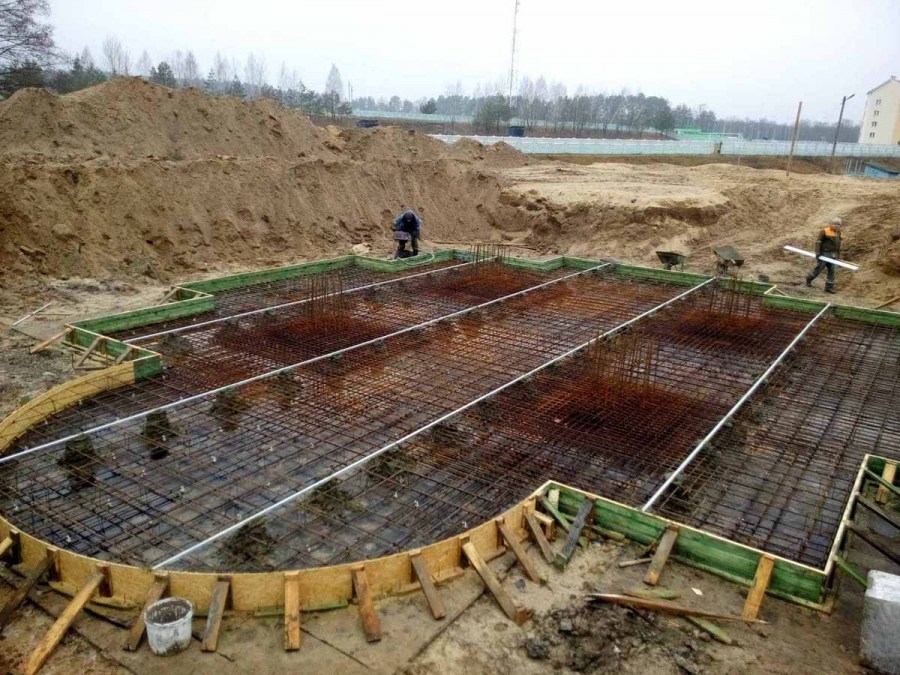
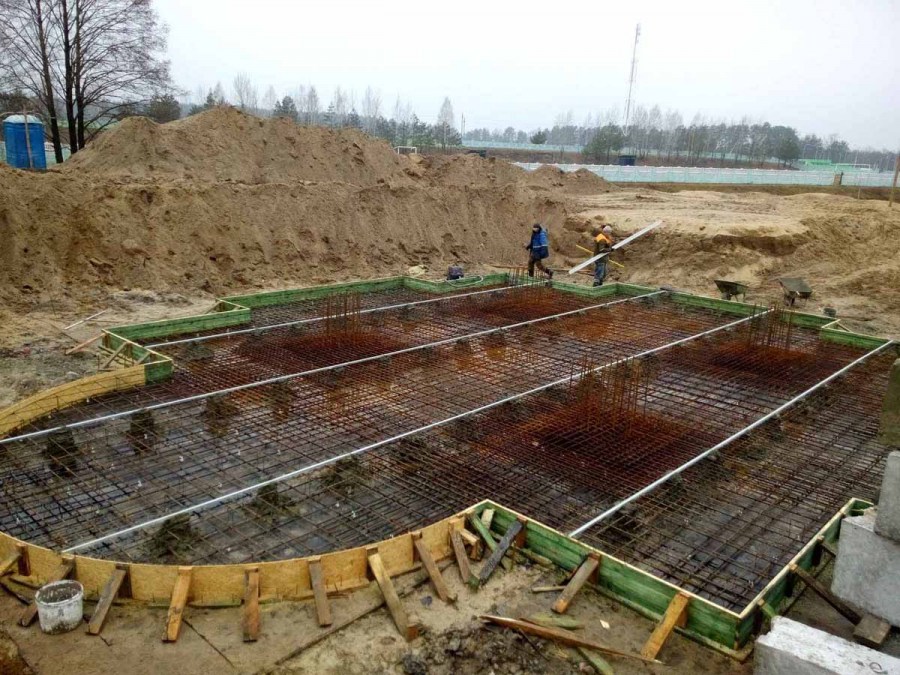
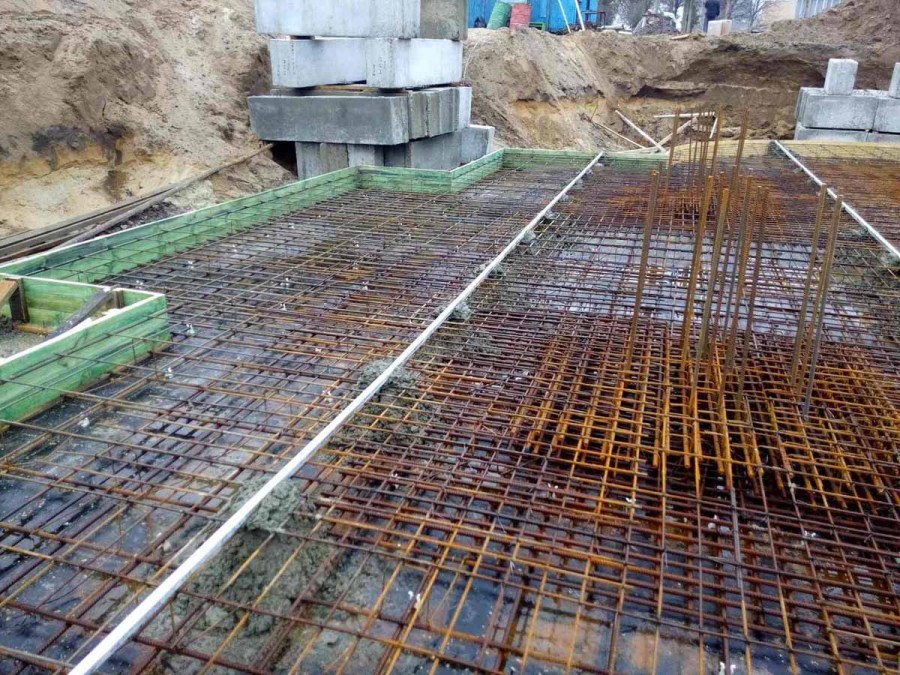
The slab foundation in the section also consists in addition to the above layers of formwork and waterproofing material. The formwork is arranged from a board having a 50 mm thickness. It is arranged around the perimeter of the building.

The formwork is set to a height that is the same as the thickness of the slab foundation.After that, using the cords and level, the structure is leveled horizontally. On average, foundations with a slab from 20 to 30 cm are used.
Waterproofing
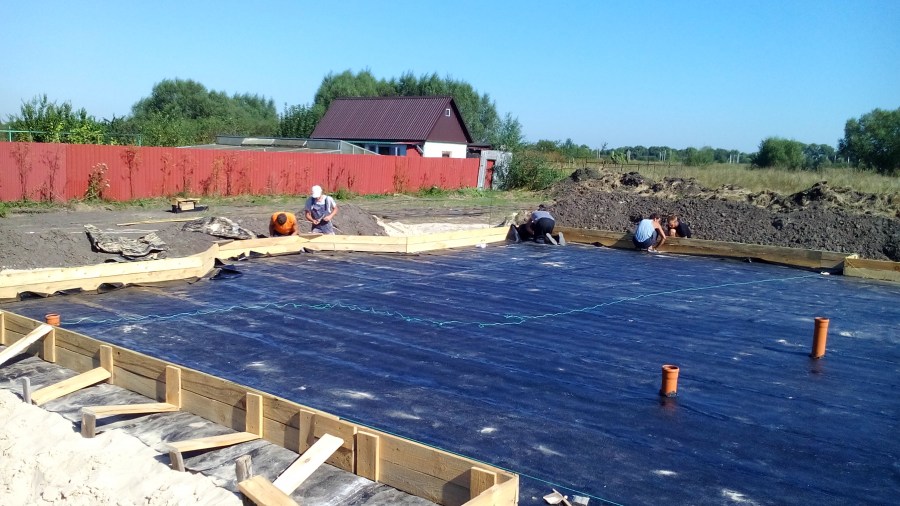
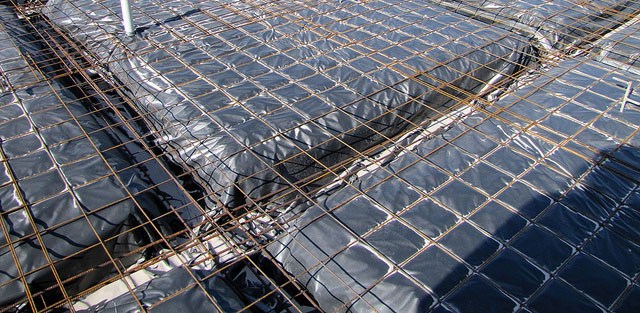
After exposing and firmly fixing the formwork, the builders carry out work on laying the waterproofing layer. Basically, roll materials that have a bitumen base are used for this. The installation of waterproofing materials is carried out with a small overflow necessary for formwork.
Waterproofing is laid over the entire height of the formwork, and then welded to each other. This will prevent water and moisture from entering the surface of the foundation slab. The best waterproofing is ensured precisely when the materials are poured onto the formwork. Among other things, this will eliminate voids and holes between the boards. The formwork can be easily disassembled after the concrete has hardened.
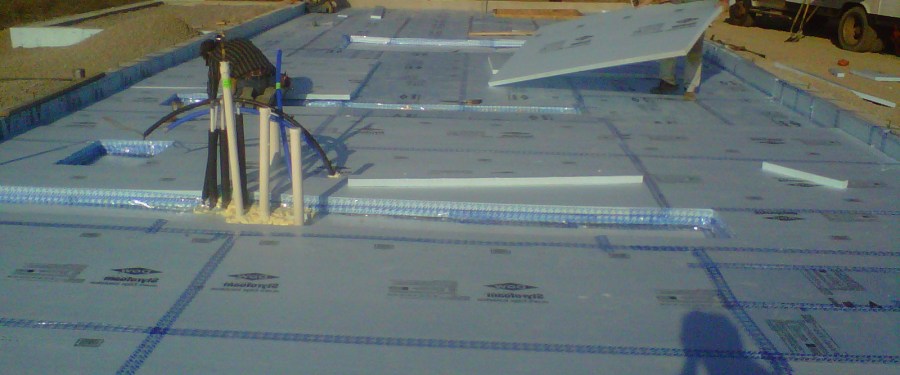
To ensure the best properties of waterproofing, it is sometimes carried out under it to lay the stove insulation in the form of extruded polystyrene foam having a high density.
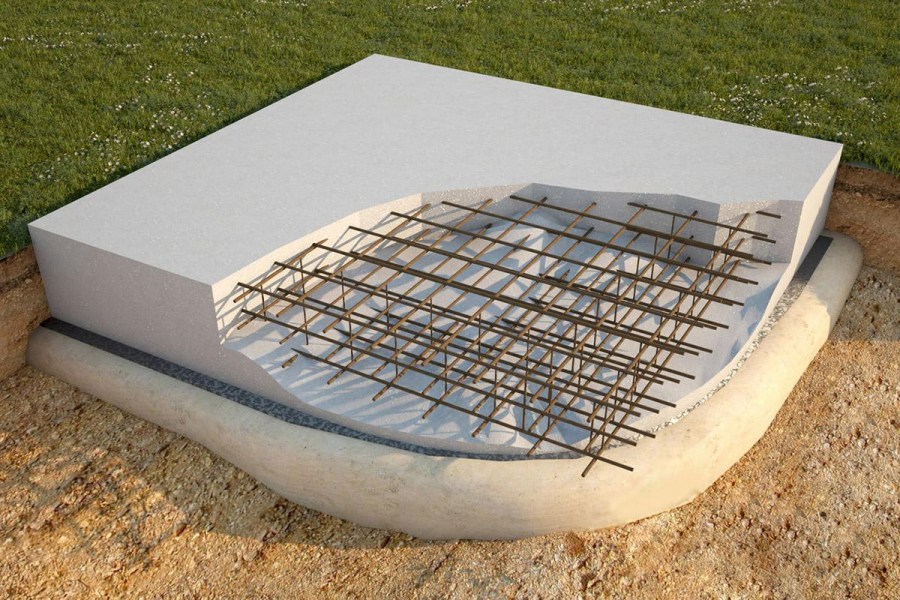
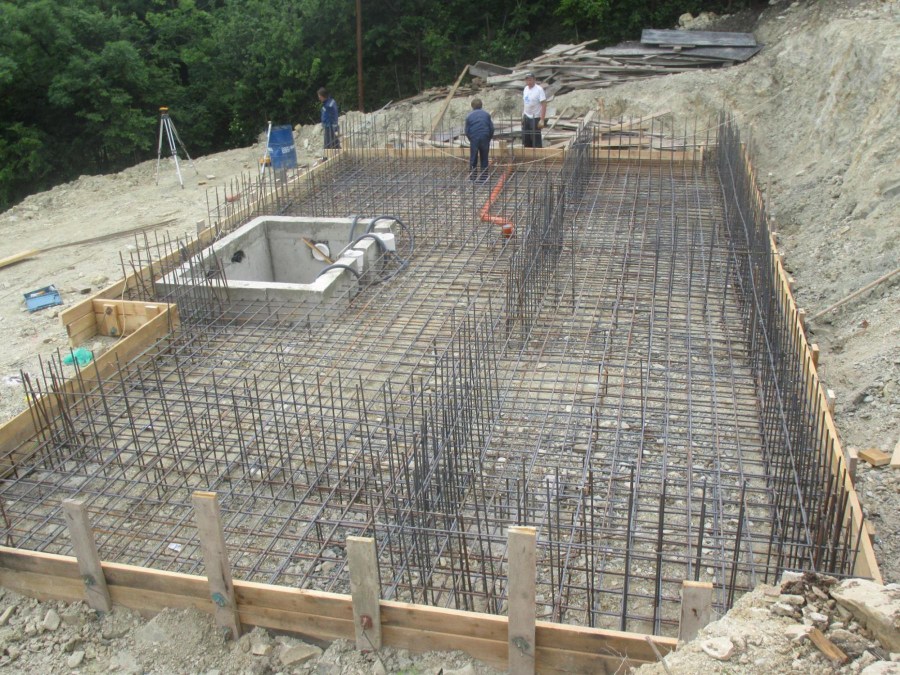
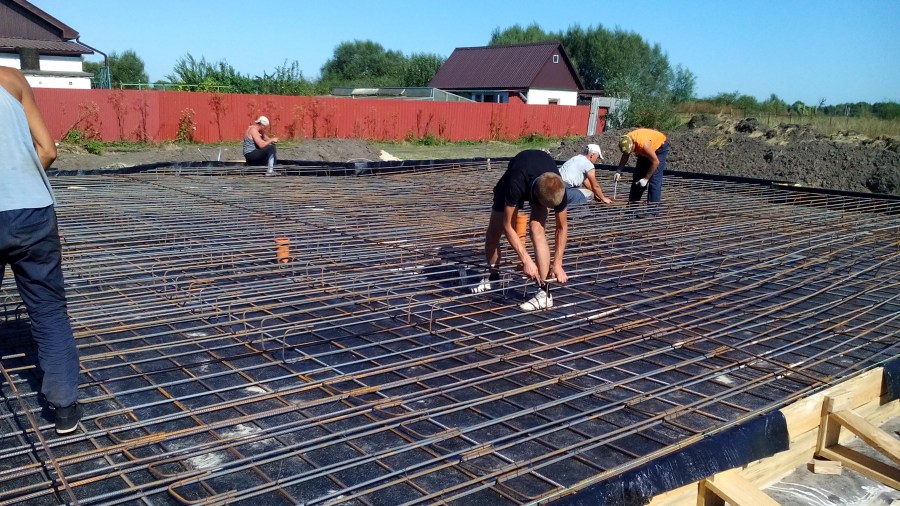
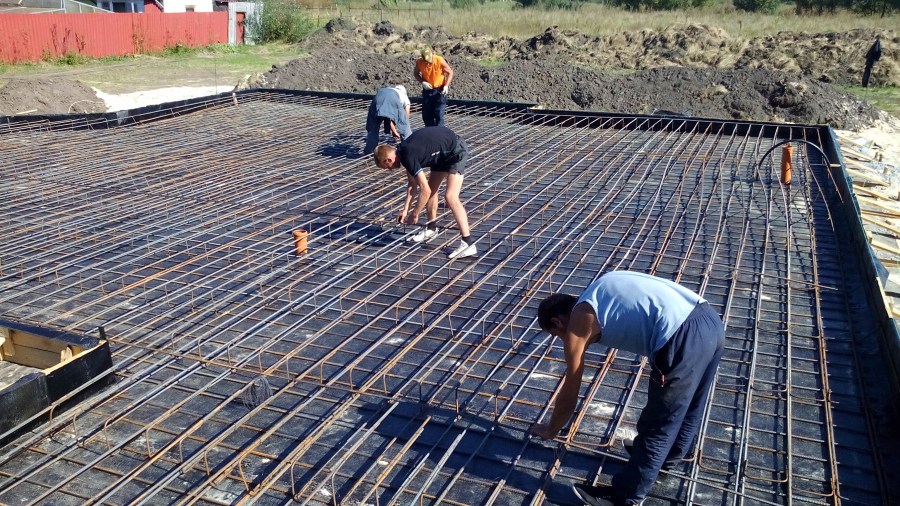
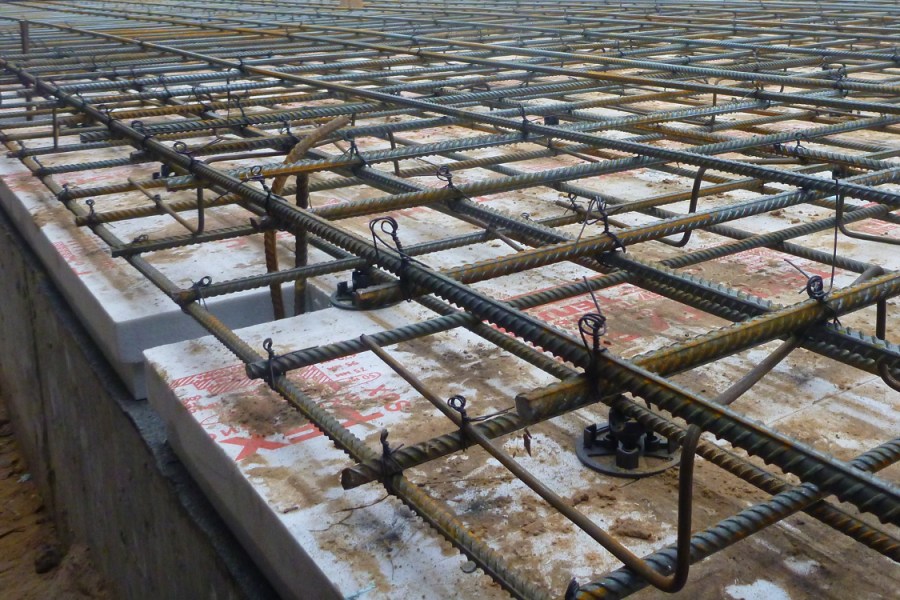
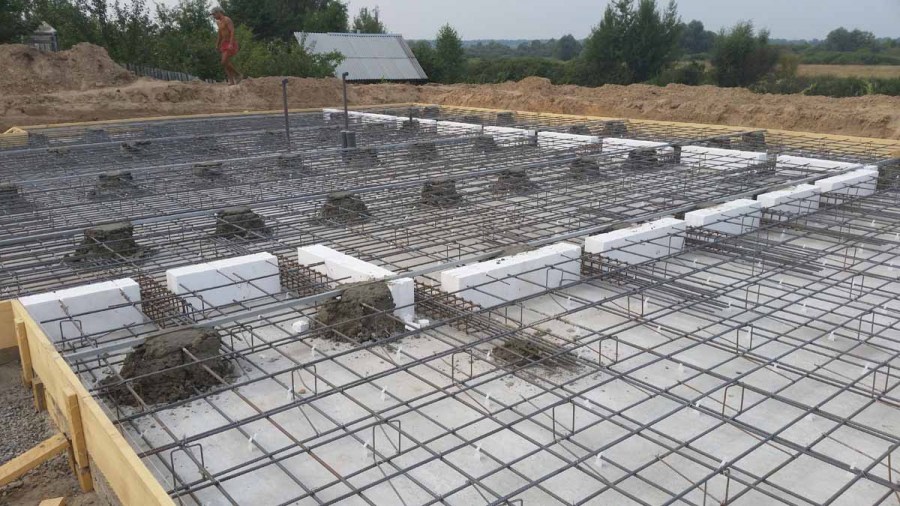
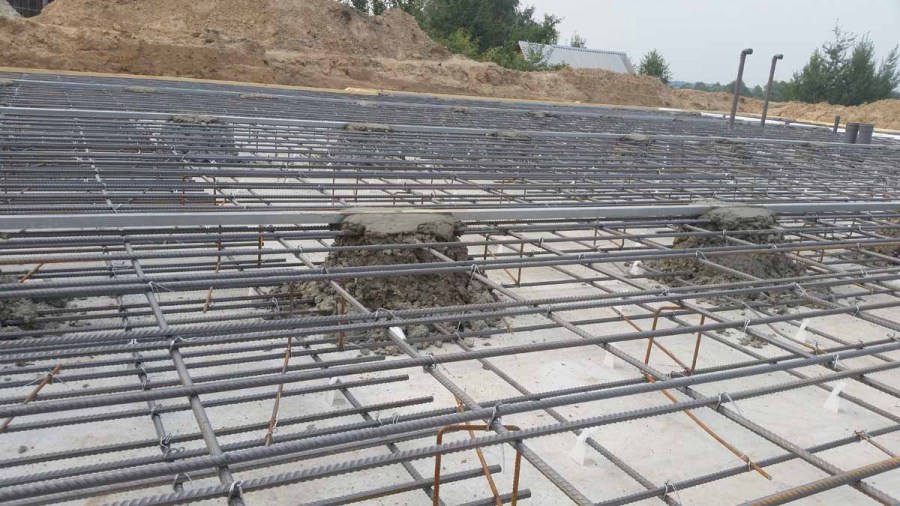
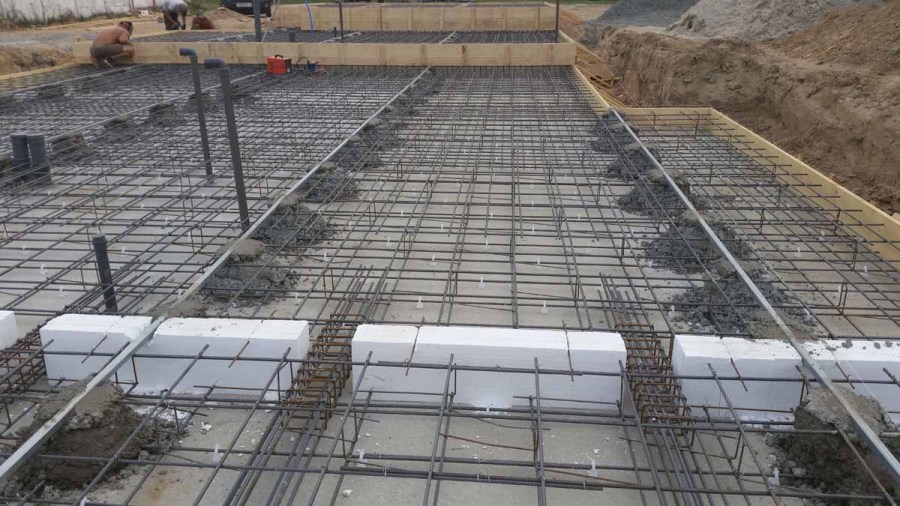
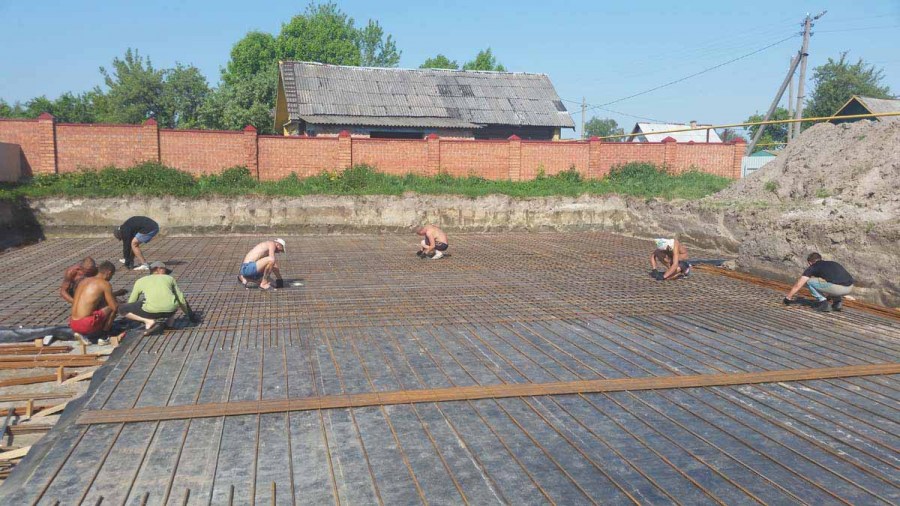
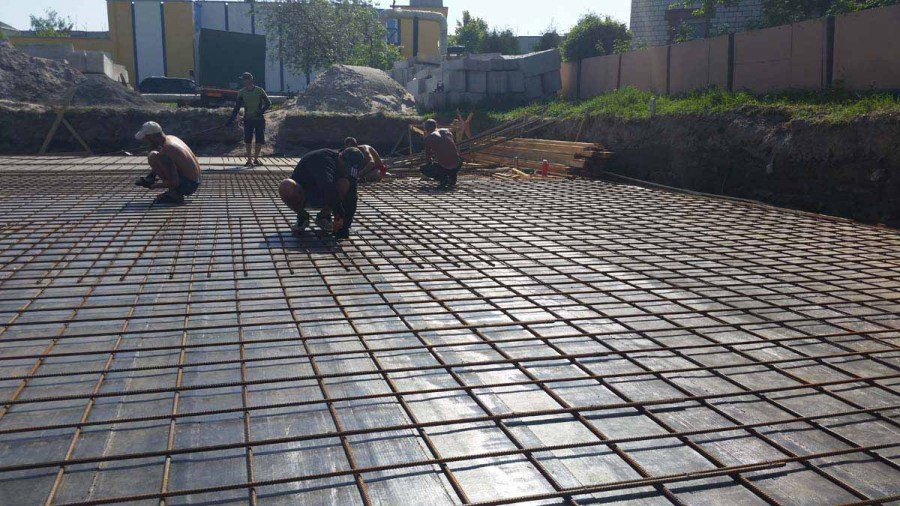
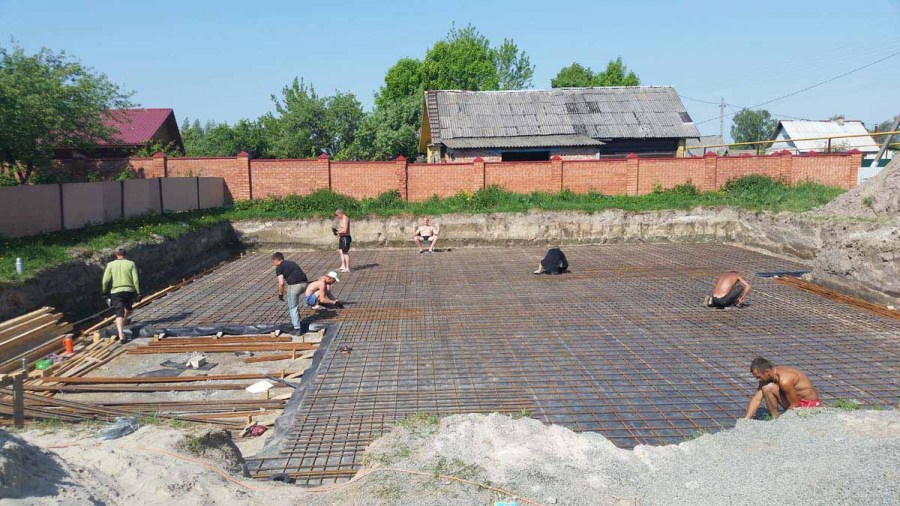
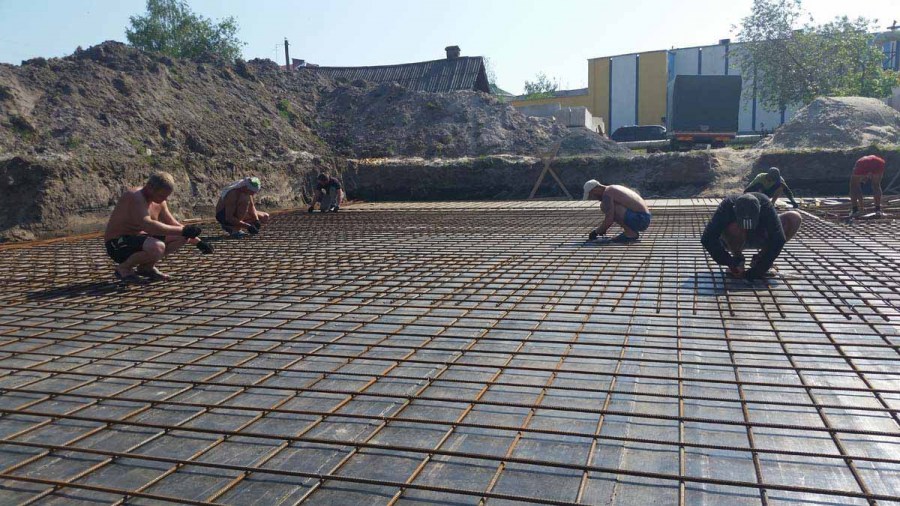
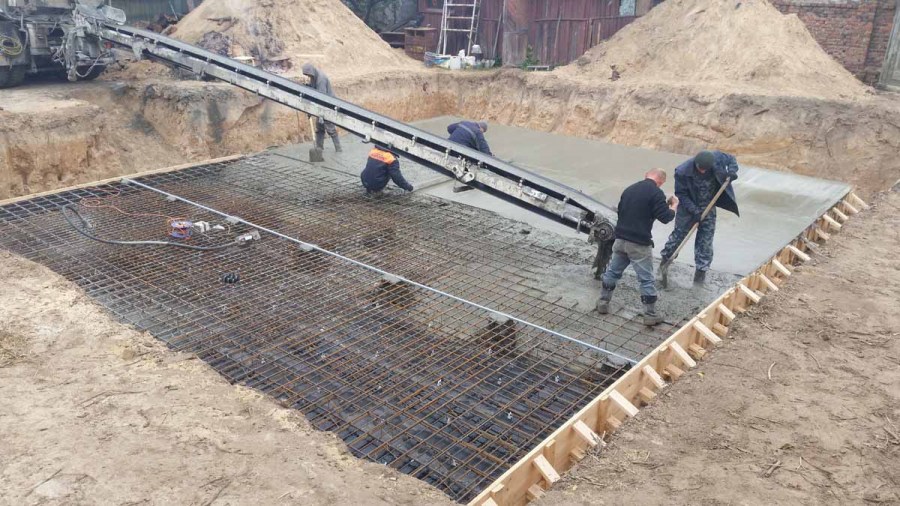
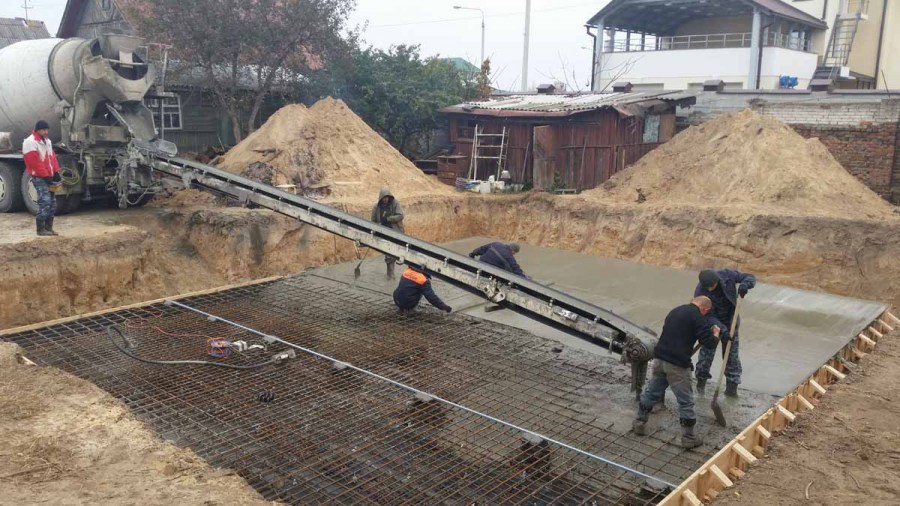
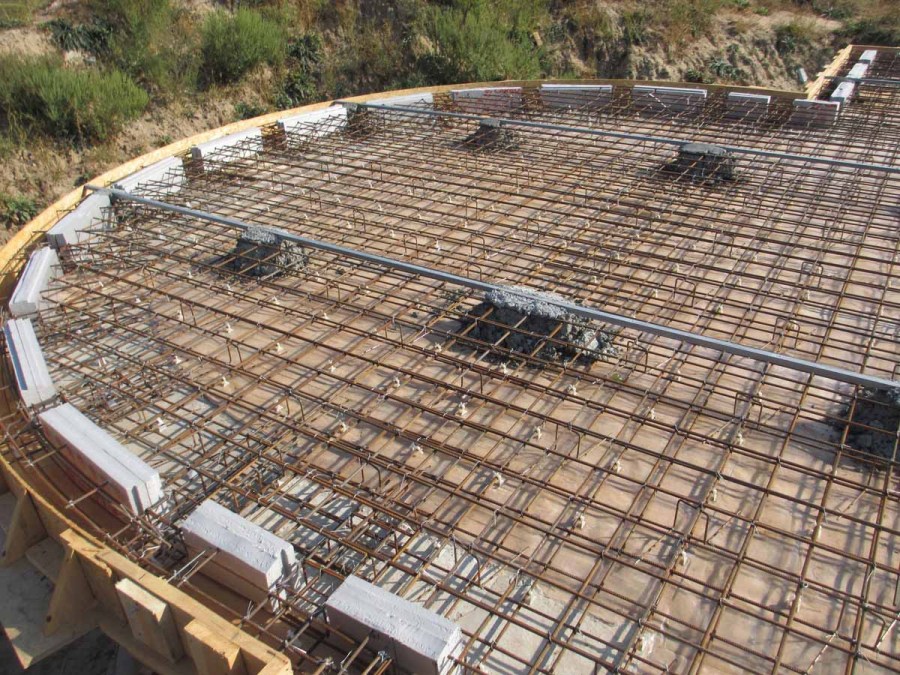
Foundation reinforcement
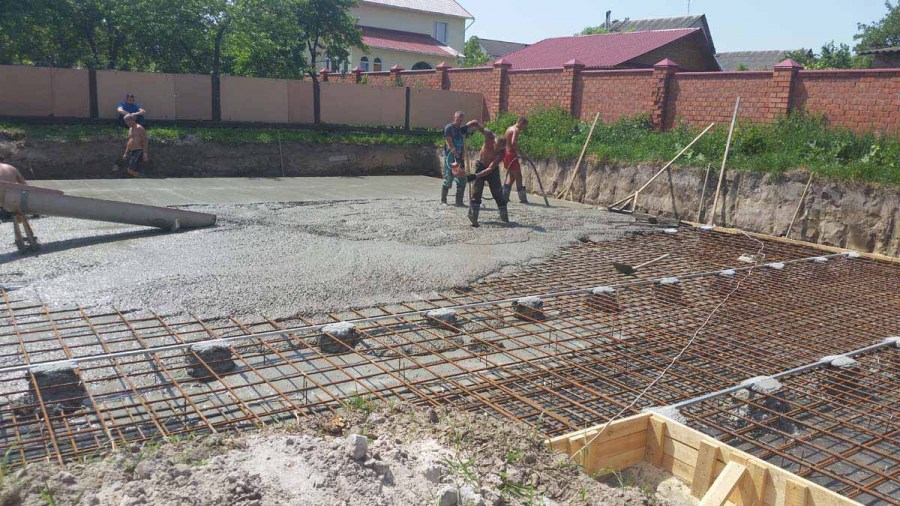
After the waterproofing layer is completely laid, reinforcement of the slab foundation is performed using reinforcement made of metal having a diameter of 10 to 14 mm. The knitting of the reinforcing cage is carried out twice. First, the bottom layer is placed on special fixing elements in such a way that the reinforcement and waterproofing have a small gap of 5-7 cm. Then, the reinforcing mesh, with a pitch of 20 to 25 cm, is knitted from the knitting wire.

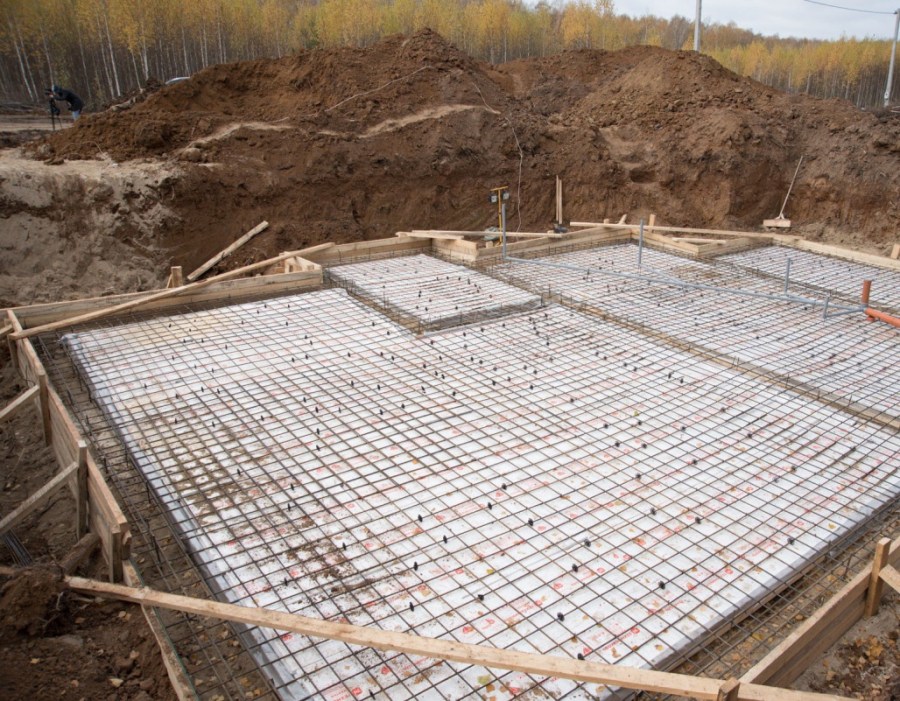

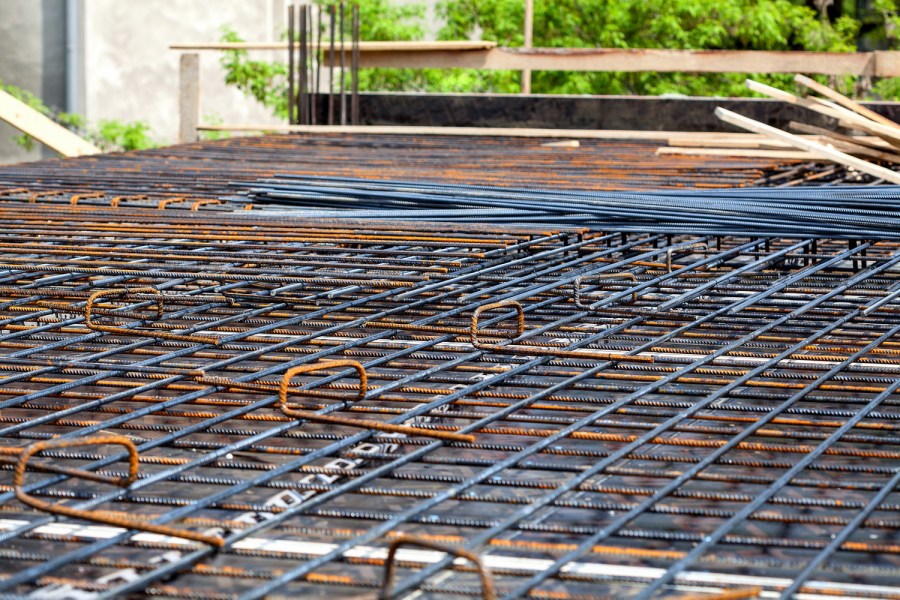
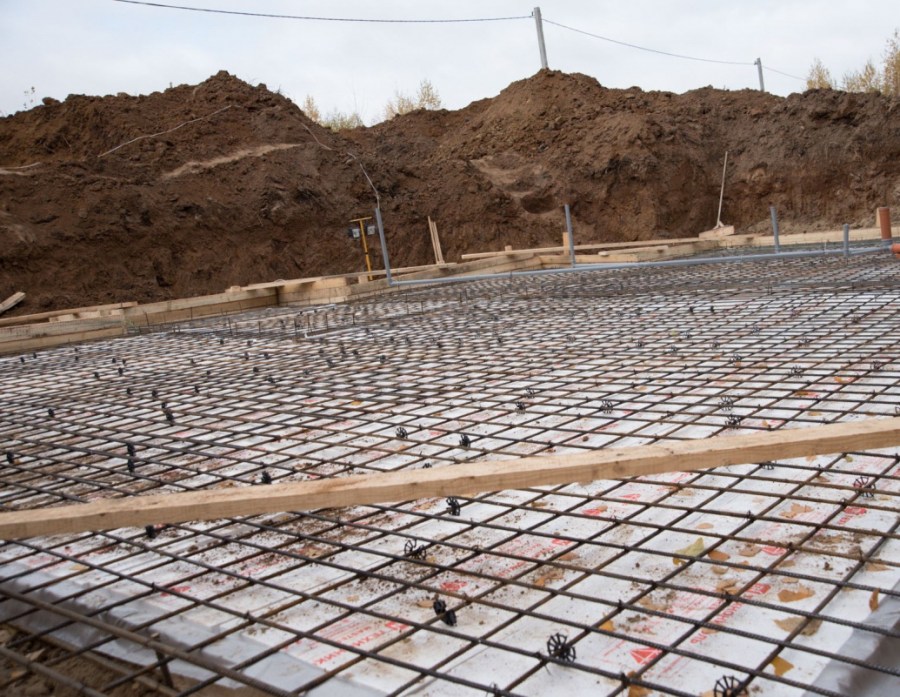
After the end of the first layer, the second is knitted. Concrete is poured, hiding reinforcement under it. Both rows of construction are connected using vertical posts, which are also made of reinforcement.
Vertical fixtures like this help to hold the top row of the net. In addition, the plate will not delaminate under the negative influence of any loads.
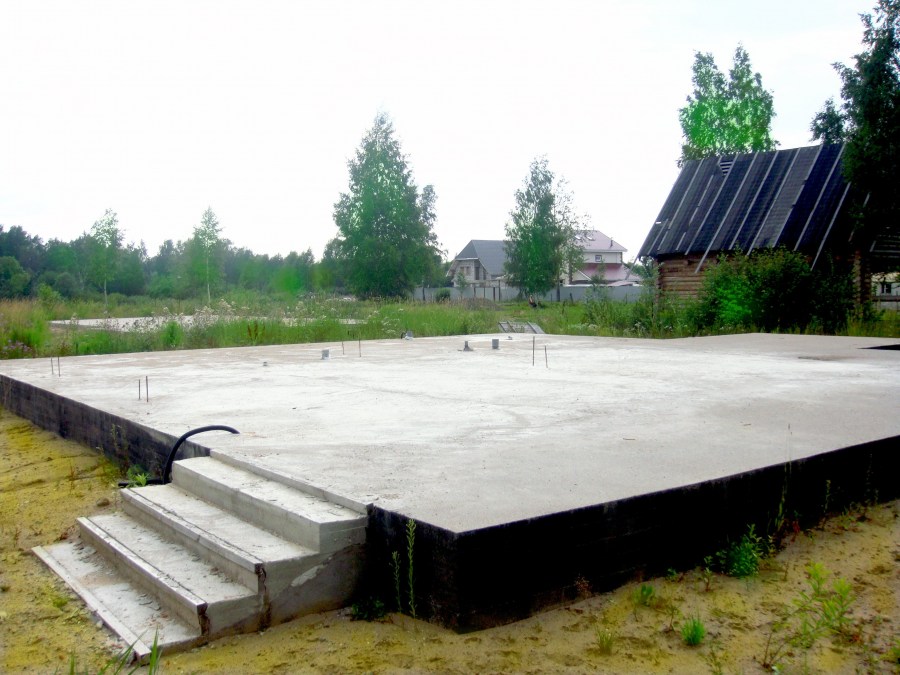
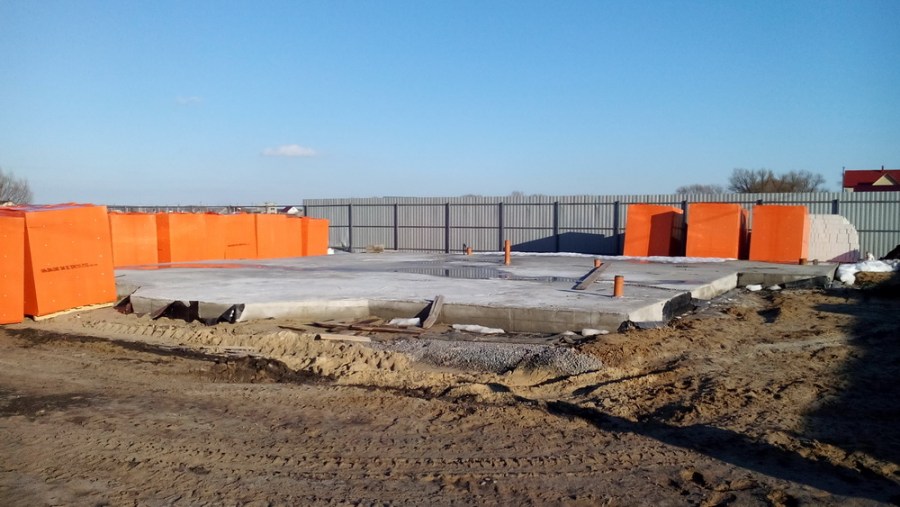
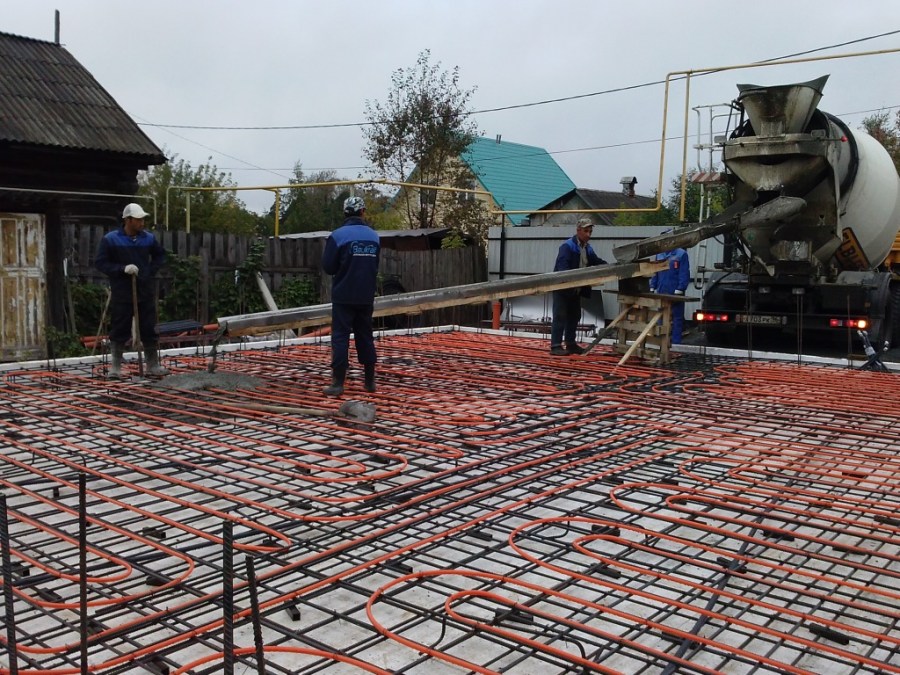
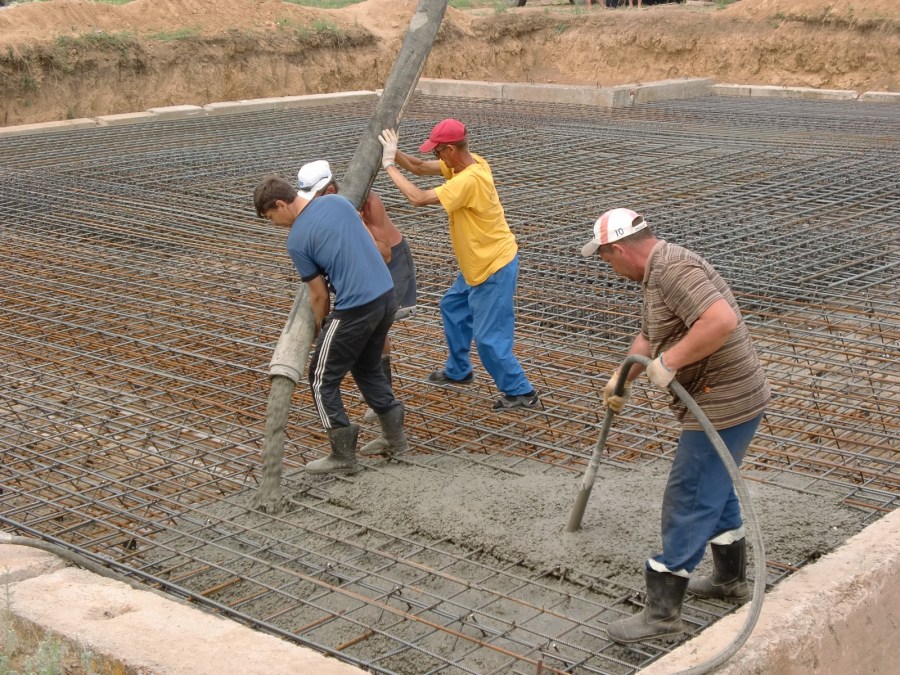
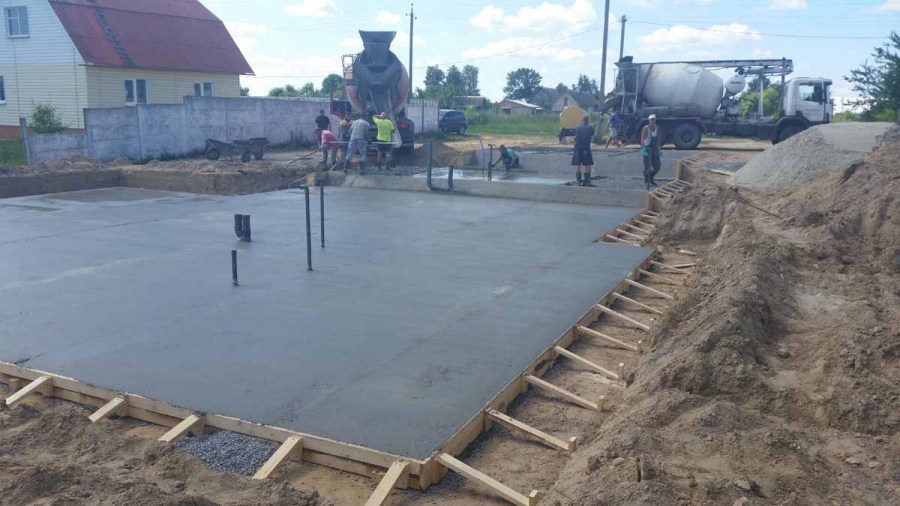
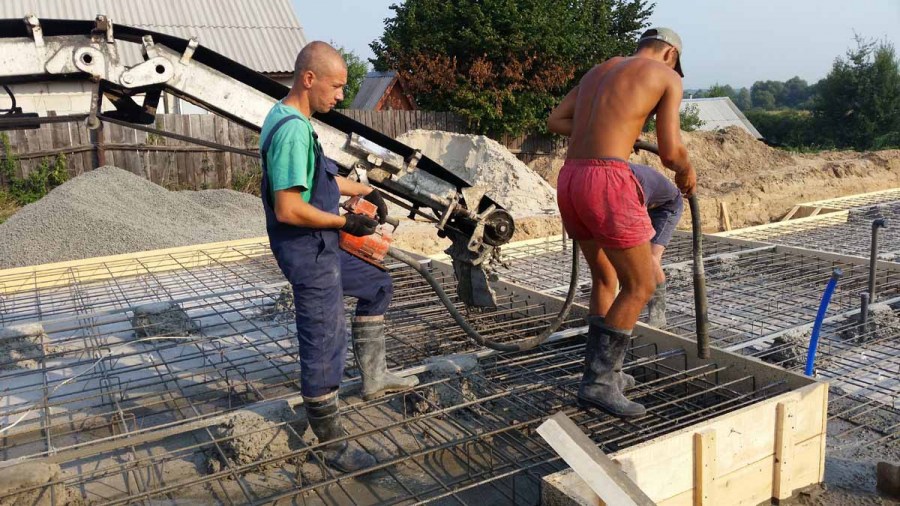
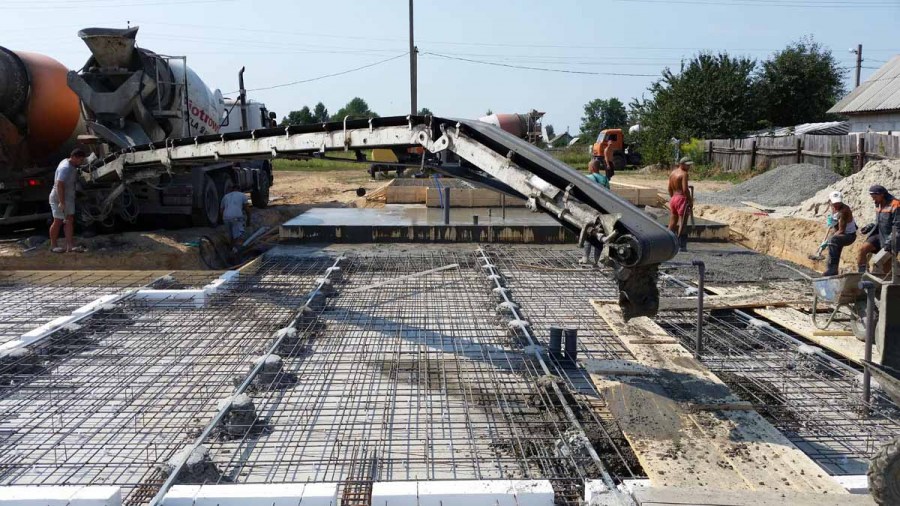
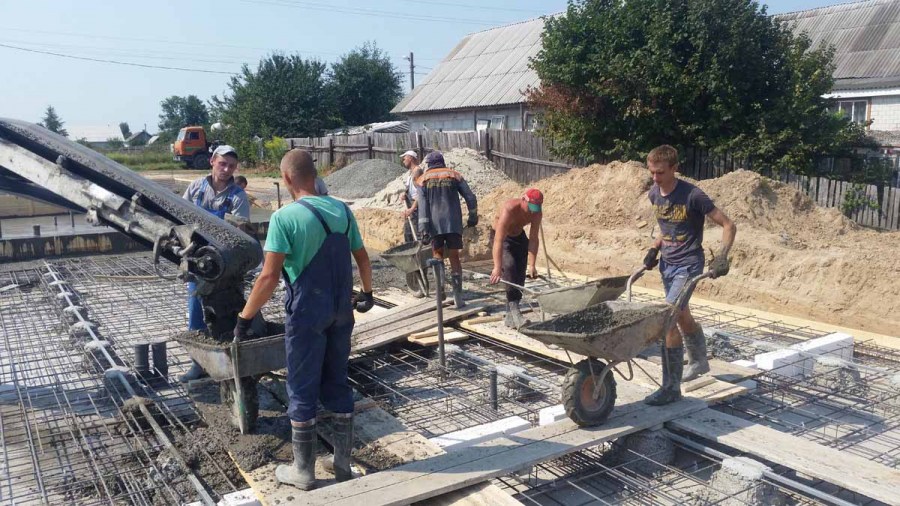
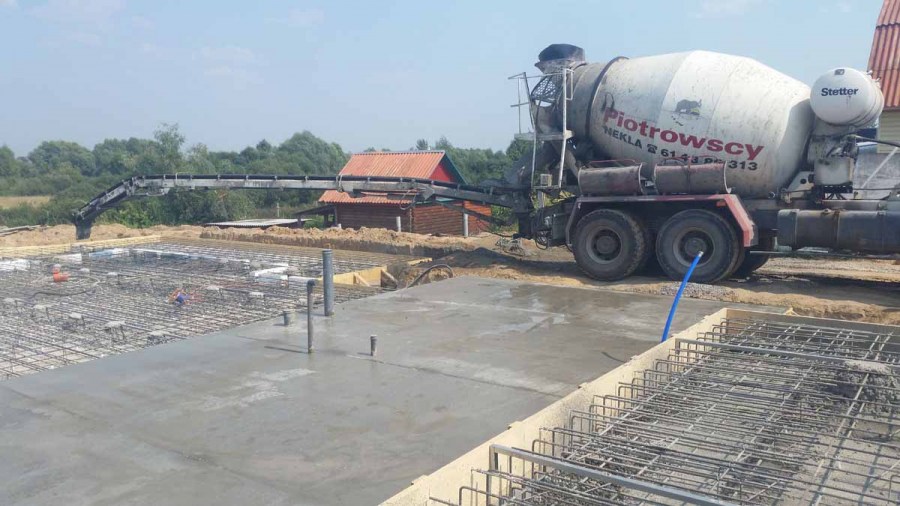
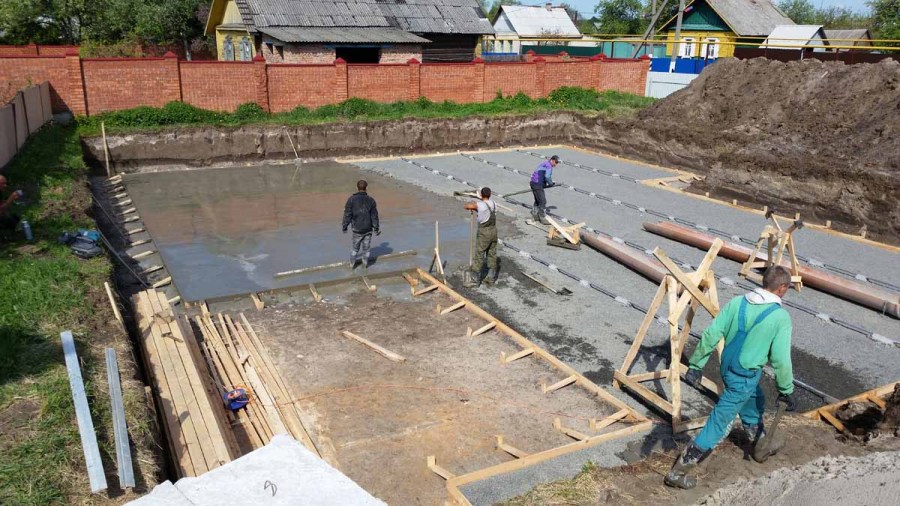
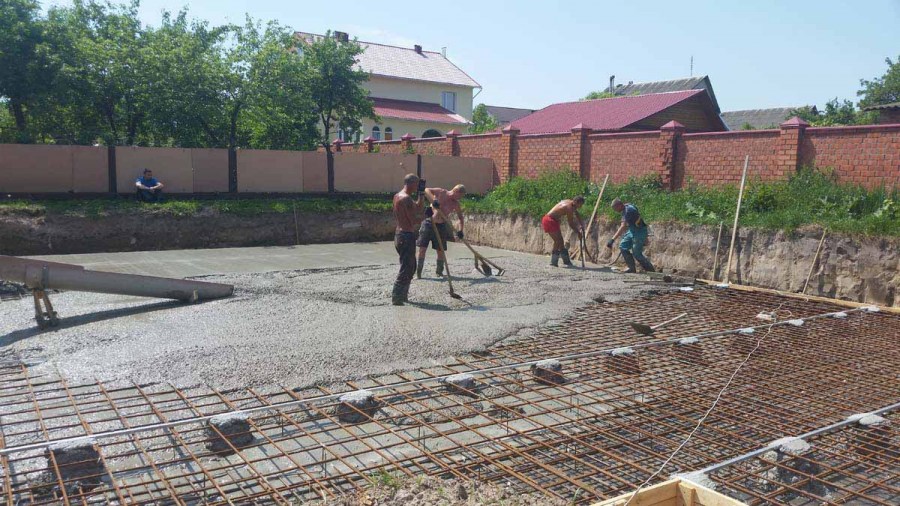
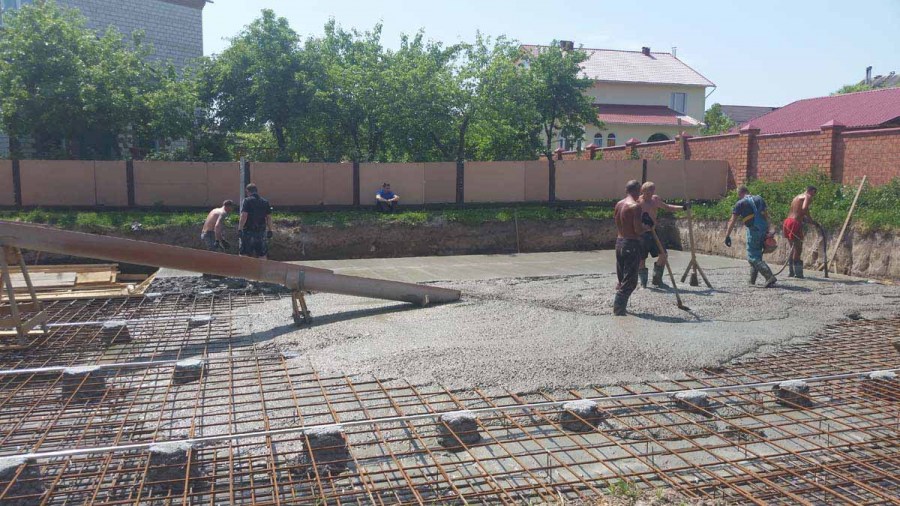
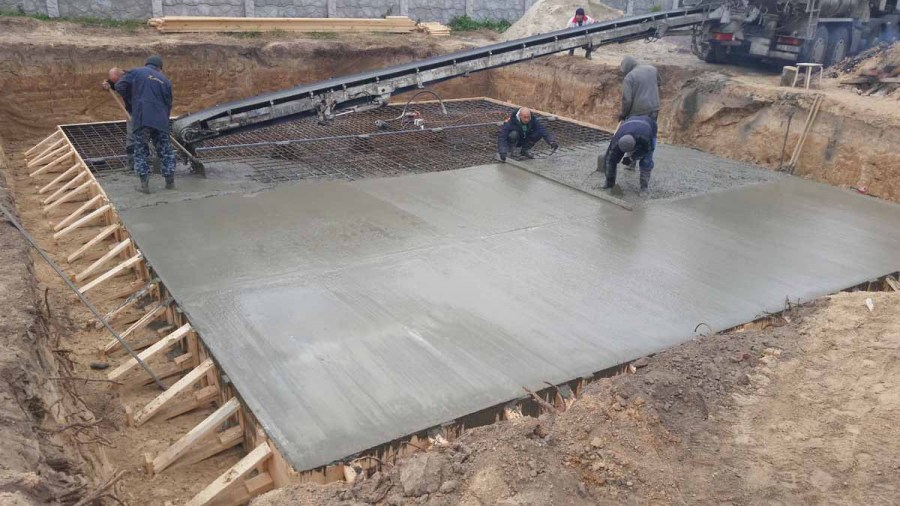
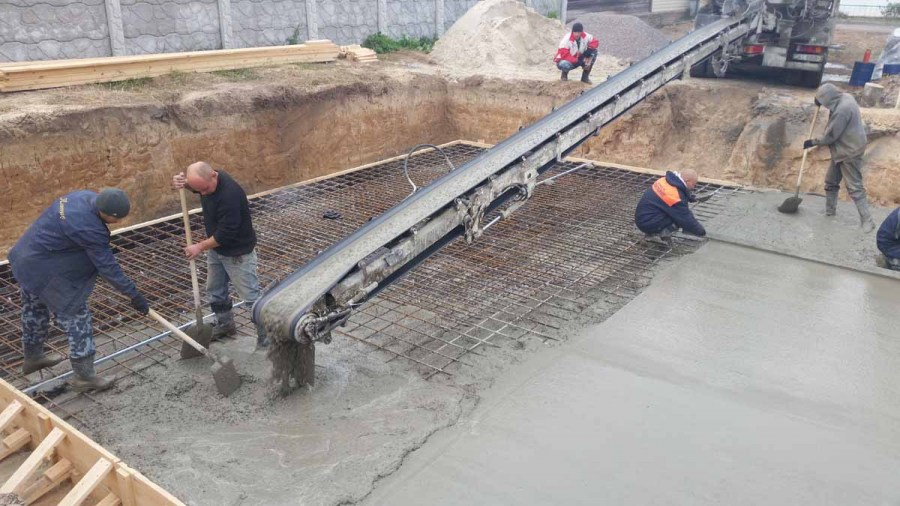
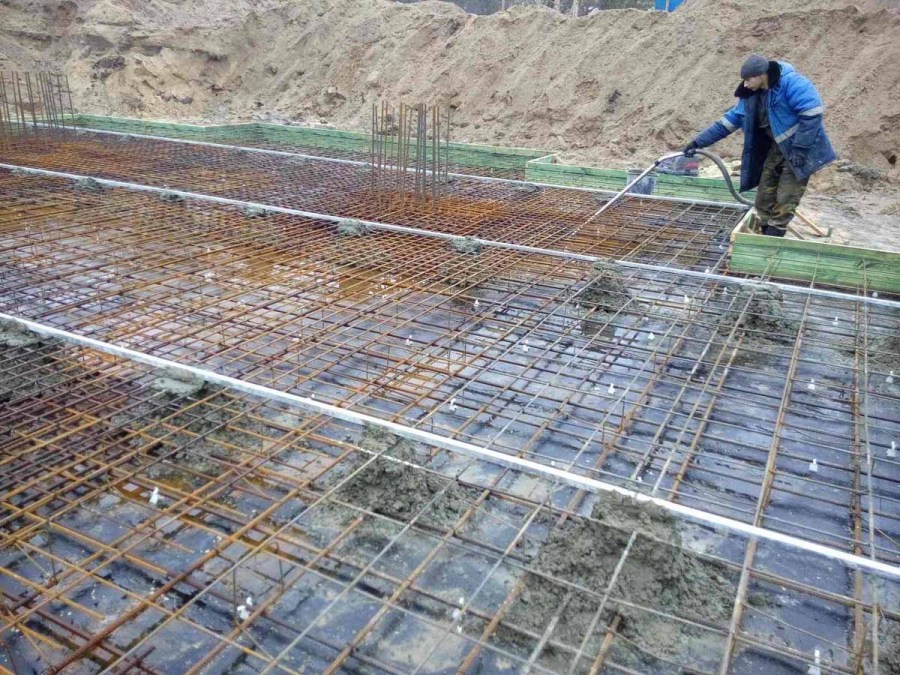
Pouring concrete into the formwork
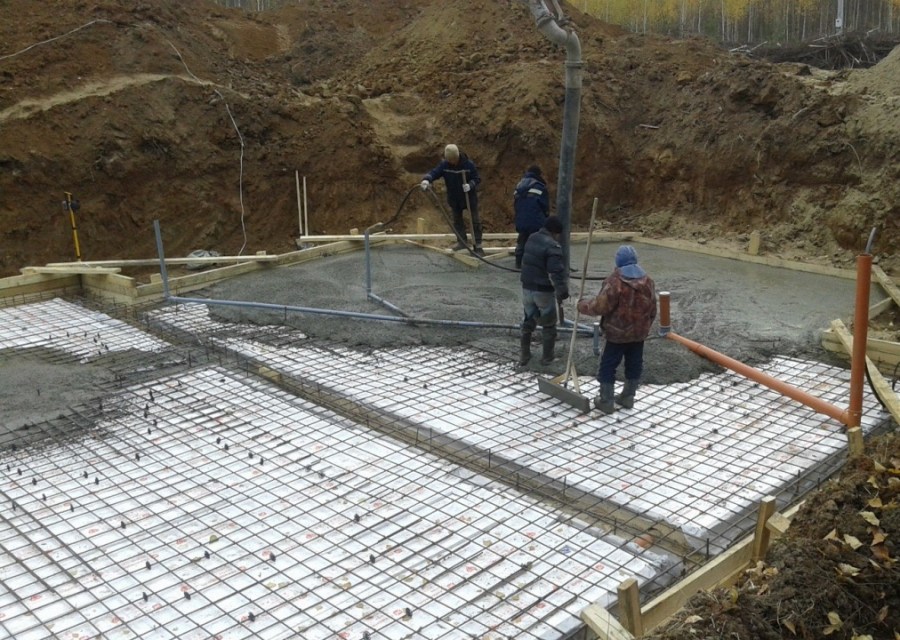
After the manufacture of the reinforcing cage, concrete having a grade of M200 and higher is poured into the formwork. Usually, builders use the M300 brand for foundation work. In order for the structure to be distinguished by its strength and reliability, the foundation should be poured immediately after the delivery of concrete to the place of construction work.


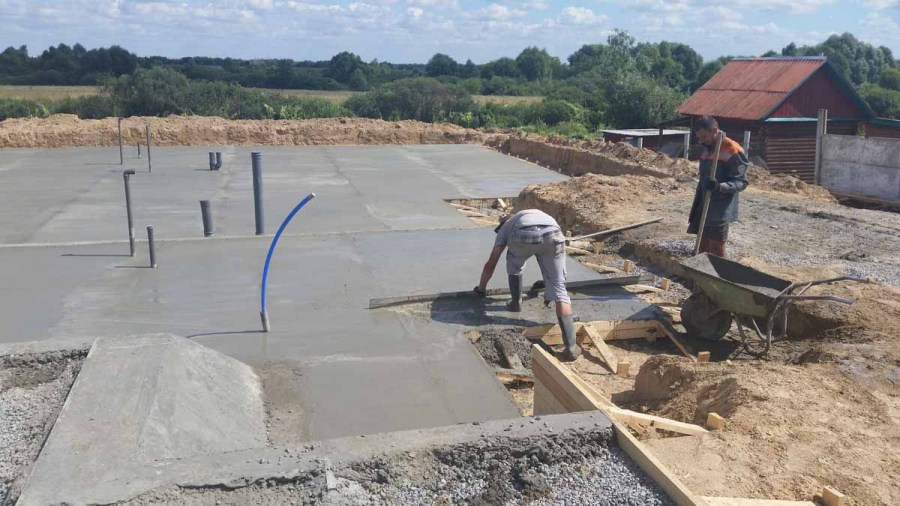
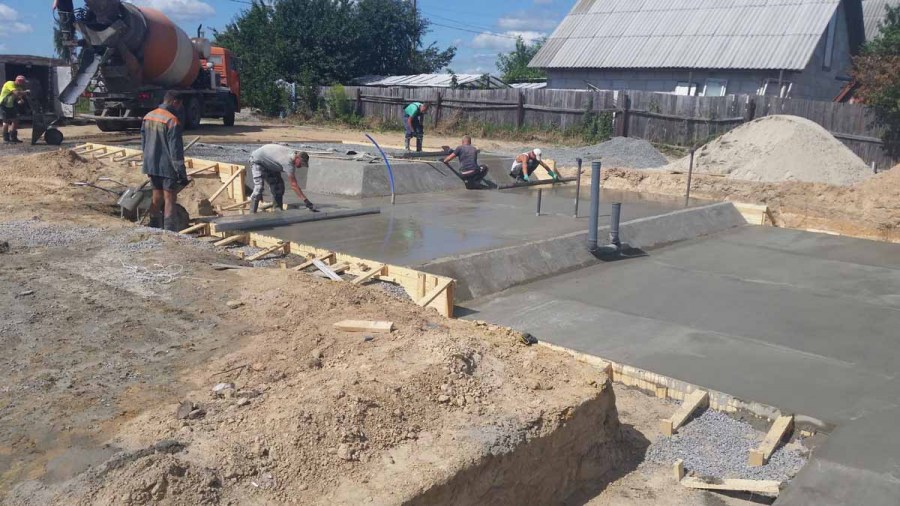
After pouring concrete, it is necessary to use an industrial vibrator, which will help get rid of voids. Next, the flooded slab is leveled horizontally, which will help to build smooth walls and arrange floors. Alignment is carried out using a flat rail or board.

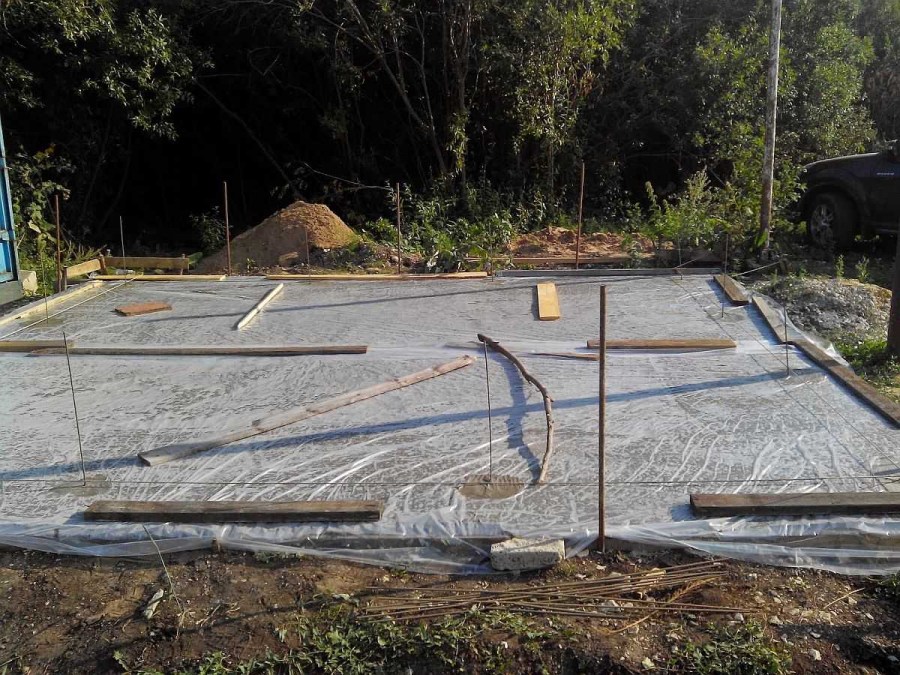
In the future, the slab foundation should stand for a month at an air temperature of 20 degrees Celsius. As the temperature rises, the flooded base spills with water and is covered with film material, which will prevent the rapid evaporation of moisture.

If the foundation will stand throughout the winter period, then it should be covered in order to exclude the negative impact of atmospheric phenomena in the form of rain and snow.

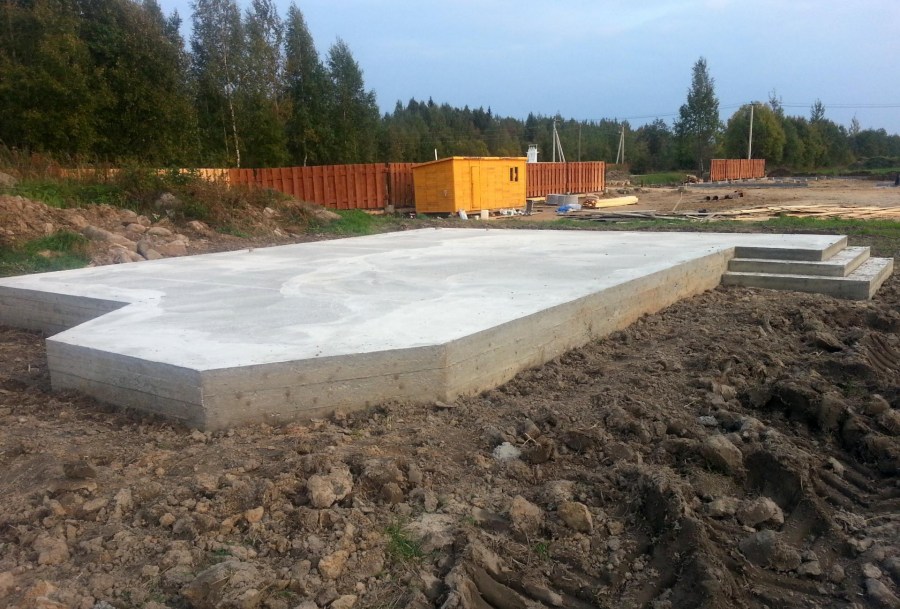
You can easily fill the slab foundation yourself by viewing the photo of this process in stages. In the absence of the necessary skills, use the services of professional builders.
Slab foundation photo


Dahlias - an overview of the best varieties + growing instruction (100 photos of flowers)
DIY rabbitry - 110 photos and description of the stages of construction
Dry closet for a summer residence: 110 photos of options and a description of the ideal toilet
Join the discussion: